Category Archives: Recipes

Sour Cream Gingerbread Recipe

I love this time of year, when it’s socially acceptable to start baking all things holiday! One of my favorites is classic gingerbread. I’m not one to mess with tradition and add all sorts of new flavors. That said, I’m not opposed to salted caramel anything!

I’ve made this straight forward recipe for years and always go back to it even after veering off to try something new. It’s super easy, comes out moist (really need another word to describe food in that way. If you come up with one let me know!) every time and is a crowd pleaser. Feel free to play with the amount of ginger in this recipe and/or add some candied ginger to the mix if you like that extra kick. Enjoy and happy holidays!

Sour Cream Gingerbread

Ingredients:
  • ½ cup melted butter
  • 2 eggs
  • ½ cup sour cream (or Greek yogurt)
  • ½ cup Molasses
  • 1 cup sugar
  • 1 ½ cups flour (can use a third or a half whole wheat)
  • 1 tsp. baking powder
  • ½ tsp. baking soda
  • ½ tsp. salt
  • 1½ tsp. ginger (or a blend of your favorite gingerbread spices)
Instructions:
  1. Preheat oven to 350 F.
  2. Grease and flour an 8”x8” baking pan or line it with parchment paper. I used a loaf pan this time.
  3. Cream the butter and slowly add the sugar until light and fluffy.Add sour cream, molasses. Add eggs continuing to beat until well blended.
  4. Whisk flour with baking soda, baking powder, salt and ginger and stir into the butter mixture.
  5. Pour into prepared pan and bake for 30-40 minutes, until a toothpick comes out clean. If using a loaf pan, increase baking time to 45-50 minutes.


Curried Cauliflower Soup with Cashew Cream

IMG_7312

I recently discovered cashew cream (instead of using regular cream) from the blogger Pinch of Yum over on Instagram. I made the cashew cream the other day to use in her creamy tomato sauce pasta and it was so good (you should try it!) and better yet, it was soooo easy! But I had about half of the cashew cream left over and I didn’t want the creamy cashew goodness to go to waste so I thought it would work well in a cauliflower soup I had been wanting to make. And what goes better with cashews than curry? They are made for each other, and quite frankly, cauliflower flawlessly cuddles up with those two perfectly as well.

I was thinking this soup is either going to be a complete miss or a complete hit. And from my perspective, it was a complete hit (otherwise I wouldn’t be sharing my fail, right?!). Even my picky 5 year old said she liked it (wha, wha??!!). My 8 year wouldn’t try it, but she is usually my food adventurer so I’ll give her a pass this time and say she was just in a stinker of a mood. Which she was. So here is the recipe to give it a try and I am curious what you think.

Curried Cauliflower Soup with Cashew Cream

Ingredients

  • 1 head cauliflower, cut into florets
  • 2 tablespoons vegetable oil
  • 1 teaspoon salt
  • 1 tablespoon butter, cut into small pieces
  • 1 large yellow onion, diced
  • 4 cloves crushed garlic
  • 1 teaspoon curry powder
  • 1 teaspoon ground turmeric
  • 1 quart vegetable stock
  • 2 cups cashews
  • 2 1/2 cup water
  • salt and ground black pepper to taste
  • 2 tablespoons chopped fresh parsley or cilantro

Directions

  1. Heat Olive oil in a large pot over medium  heat. Saute onions in oil until soft, about 5 minutes. Stir garlic into the onion and continue to cook until fragrant, about 1-2 minutes more; season with curry powder and ground turmeric. Stir until combined.
  2. Stir chopped cauliflower with the onion mixture. Pour stock and 2 cups water over the cauliflower mixture. Place a cover on the saucepan and bring the stock to a boil. Immediately remove the cover, reduce heat to low, and cook at a simmer until the liquid reduces slightly, about 10 minutes.
  3. Puree mixture in the saucepan with an immersion blender until mostly smooth.
  4. In a blender, blend the cashews with the remaining 1/2 cup water. Blend until very smooth. Reserve half of your “cashew cream” in the fridge for another recipe, and add the other half to the soup pot. Stir until creamy.
  5. Stir cashew cream into the soup; season with salt and pepper. Ladle soup into bowls and garnish with parsley/cilantro and/or croutons if you have them.

Lazy Vegetable Pesto Soup

img_7073

This is by far my favorite vegetable soup. I usually think they can be bland and boring. So one day I had a little bit of pesto left over and decided to at it in…can’t hurt I thought. And wow, just that little bit elevated the flavor to a new level!

Here’s my other secret for us lazy…err I prefer to use the term “busy”…people. Pick up some pre chopped Mirepoix (onion, carrots and celery). It seriously cuts down on chopping time and is inexpensive. Trader Joe’s carries it in a 14.5 ounce container and all the work is done for you. It’s the perfect amount for a pot of soup – I’m telling you folks, I use this almost every time for soups now. Also to cut down on time, Trader Joe’s fresh Genova Pesto tastes almost like home made. This soup comes together in no time when you only have to chop a few things! And it’s so comforting on a chilly winter day.

Lazy Vegetable Pesto Alphabet Soup

Ingredients:

  • 2 tblsp olive oil
  • 14.5 oz pre chopped Mirepoix
  • 1-2 small chopped zucchini 1/4″ cubes
  • 2 32oz vegetable stock
  • 1-2 cups roughly chopped fresh spinach
  • 1/2 cup chopped parsley
  • 3.5 oz fresh basil pesto
  • 1 cup alphabet past or your favorite mini pasta
  • Salt and pepper to taste

Directions:

Heat oil in a large pot over medium heat. Add Mirepoix and chopped zucchini to saute for 5-8 minutes until soft. Add stock and bring to a boil. Add spinach, parsley, pesto and pasta. Simmer for 15-20 minutes (until pasta is cooked). Salt and pepper to taste.

It’s as easy as that! In about 30 minutes start to finish you have a healthy, cozy and yummy meal 🙂


Hazelnut Chocolate Shortbread Christmas Cookies

img_7031

I’m failing my early New Year’s resolution already 🙁 I vowed I would only make one Christmas cookie this year since they don’t get eaten like they used to (this low sugar thing, blah, blah, blah). I let me girls pick what kind they wanted and of course they wanted cut-out sugar cookies with all the bells and whistles of frosting and sprinkles (insert heavy sigh here). I resolved myself to say that was ok. But I should know myself better after 39 years of this. Lying in bed the other night, I was thinking about my Nana’s shortbread that I loved as a kid and haven’t made in several years. Then I thought how much I love Nutella…errrr… chocolate hazelnut butter. Hello! A marriage made in heaven I say.

So I made my own Nutella from my Blendtec cookbook. Super easy by the way. Then I set about making the shortbread yesterday. As you can see by my little post-it note, that’s all I have of my Nana’s recipe. I have no idea where it came from, but my dad grew up with them, my mom made them for my brother and I as kids and now I make them. It’s a super simple recipe with few ingredients. I think it’s the simplicity that I like. Or maybe it’s the memories I hold on to of my Nana who passed when I was young. Or maybe it’s the brown sugar, buttery, flakiness of the cookies that I love. I’m guessing it’s the whole package 🙂

image

Without further ado here is the recipe for the chocolate nut butter and shortbread:

Chocolate Hazelnut butter: recipe from Blendtec

Ingredients:

  • 2   cups toasted hazelnuts
  • 12   cup coconut oil, melted
  • 12   cup cocoa powder
  • 1   tsp vanilla extract
  • 1   cup powdered sugar

Directions:

  1. Add coconut oil and hazelnuts to FourSide or WildSide+ jar and secure lid (If making in Twister jar, decrease ingredients by half). Blend on a low speed for 15 seconds and then increase to a high speed for 35 seconds (until blended time reads 50 seconds).
  2. Stir mixture towards center of jar, then secure lid.
  3. Blend on a medium speed for 50 seconds. Stir, secure lid, and repeat this cycle two more times.
  4. Add cocoa powder, vanilla extract, and powdered sugar to jar and secure lid. Blend on a medium speed for 50 seconds.
  5. Store in an airtight container in the refrigerator for 4-6 weeks. Bring to room temperature before serving or spreading on shortbread cookies.

*Note: To toast hazelnuts, preheat oven to 350°F. Spread hazelnuts on shallow baking sheet and toast in oven until skins darken, approximately 8-10 minutes. To ensure even toasting, stir the hazelnuts after 4-5 minutes in oven, then finish toasting. Wrap the cooled hazelnuts in a clean kitchen towel and rub towel back and forth to remove most of the hazelnut skins.

Nana’s Shortbread Recipe:

Ingredients:

  • 1 pound cold unsalted butter, cubed
  • 6 tbsp brown sugar
  • 4 cups white flour
  • 1/2 tsp salt

Directions: Makes Approx. 30-40 individual cookies (15-20 sandwich cookies)

  1. Heat oven to 325°
  2. In a standing mixer, mix on medium low all ingredients until dough just comes together, but be careful not to over mix or over handle the dough!! Form dough into a disc and wrap in plastic wrap. Chill for 30 minutes.
  3. Roll out dough to approx. 3/8 inch thick. Cut circles using a 1.5″ circle cookie cutter. *I used a 2″ in the picture above, but personally they would be better smaller and would get more cookies!
  4. Bake on cookie sheet lined with parchment paper or silpat liner for 10-15 minutes depending on your oven. Keep an eye on them the last few minutes. The bottoms should be just lightly browned.
  5. Once cooled, spread one cookie with chocolate hazelnut butter and place another on top. Store in fridge or freezer. Enjoy!

Avocado Toast with Pomegranates

img_6967

Hey y’all…I’m not from the south, but it’s such a warm and friendly opening, that it’s fun to use every now and then. Ok – back to my purpose here 🙂 I posted this beautiful pic last week on Instagram. I was craving some avocado toast, which by now, is familiar to most everyone who enjoys themselves some avocado. I do love a simple and straight forward avocado on toast sprinkled with salt and pepper and then drizzled with some olive oil. However, on this particular day, I was craving some comfort food for lunch with a bit of punch at the end. As luck would have it, I had some pomegranates to use up. Just sprinkle some on top and you have yourself an elevated avocado toast in no time at all. And it’s festive for the season. They would be great little appetizers at your next holiday party too! Just make mini versions 🙂

There really is no need for a recipe posted here, but just in case…Toast some good bread (I used Como bread, but a seeded wholegrain would be delish as well). Thinly slice some ripe avocado for your toast. Drizzle with good olive oil, sprinkle with salt, pepper and pomegranates. And the next most important step is to take a huge bite (if in the company of one’s own) and enjoy comforting yumminess of this fabulous combo!

Vegetarian Black Bean and Rice Enchiladas

fullsizerender-6

Happy Monday everyone! I hope you all had a good weekend full of fun and relaxation. I got to do a little cooking since soccer season is over and I have to say, it’s been nice to slow down a tad. For some comfort food on a rainy evening last week, I made these enchiladas that I’ve made for years that are always a hit with a crowd, but I’ve never written the recipe down. I FINALLY did this time and am here to share it with you. They are pretty simple, but the various steps adds some time. But if you do a few prep steps throughout the day or ahead of time, they are not too bad and so worth it! You can even make the filling and sauce the day before. And they make a big batch so usually freeze the smaller pan I have left for a quick meal full of healthful goodness for later on.

Feel free to play with the filling ingredients to your liking. You could add corn, red pepper, hot jalapeños, more beans, etc. For the tortillas, the enchiladas are of course super yummy with fluffy white tortillas. I’ve tried using organic whole wheat tortillas, but they simply aren’t as yummy. I prefer to use 100% wholesome ingredients, but sometimes the flavor and texture isn’t worth the substitute. I know these have a few too many ingredients, but to compromise, I have used the Mission Carb Smart wheat tortillas and they work just as well as fluffy white ones. Whatever you choose, make sure they are soft and bendable so they don’t crack while assembling.

Here’s the recipe…

Vegetarian Black Bean and Rice Enchiladas:

Makes 12-13

Heat oven to 350 F. and cook brown rice according to package directions (usually 40 minutes). While rice is simmering, prepare the following.
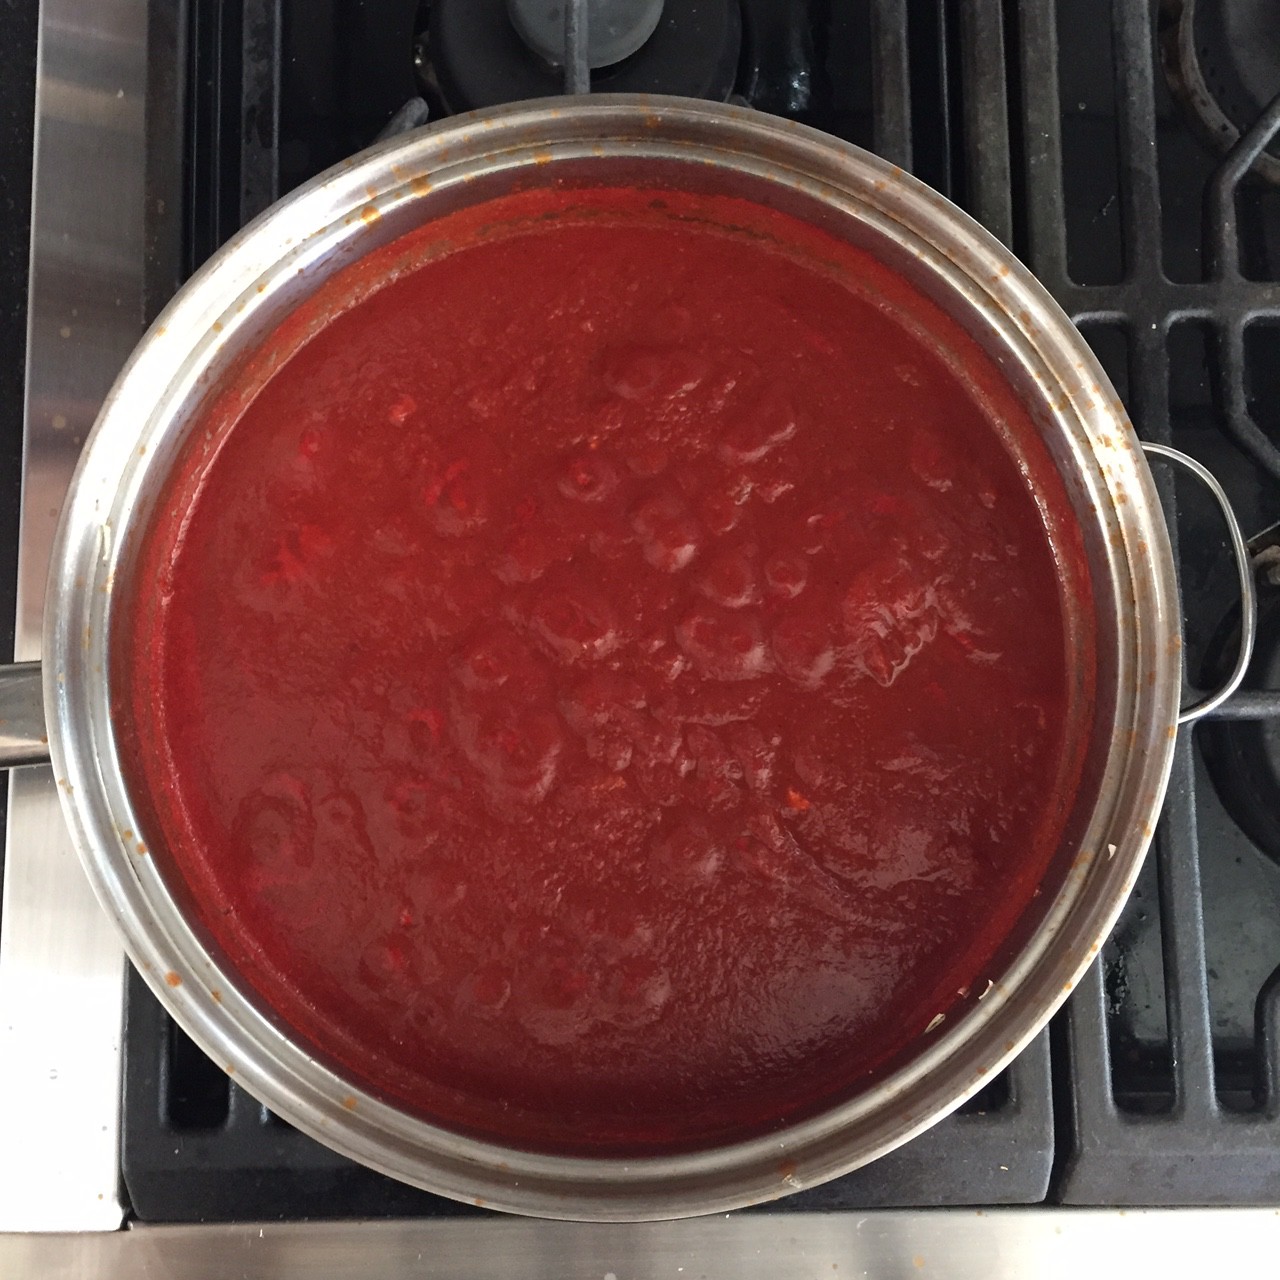
Sauce:

  • 1 1/2 tablespoons vegetable oil or corn oil
  • 1 medium onion, chopped fine (about 1 cup)
  • 1.5-3 tablespoons chili powder (depending on your desired heat level)
  • 2 teaspoons ground cumin
  • 1/2 teaspoon table salt
  • 2 teaspoons granulated sugar
  • 2 cans tomato sauce (8 ounces each) + 1 cup water

Heat oil in medium saucepan over medium, add onion and cook, stirring occasionally, until softened about 5 minutes. Add chili powder, cumin, salt, and sugar; cook, stirring constantly, until fragrant, about 30 seconds. Add tomato sauce and 1 cup water. Bring to simmer, then reduce heat to medium-low; simmer uncovered, stirring occasionally until thickened about 8 minutes. Set aside.

*You can strain the sauce for a smoother texture, but I like it a little chunky and truthfully I don’t even notice the onions after it’s baked.

img_6773

Filling:

  • 1 cup uncooked rice (follow package cooking directions)
  • 1 tablespoon olive oil
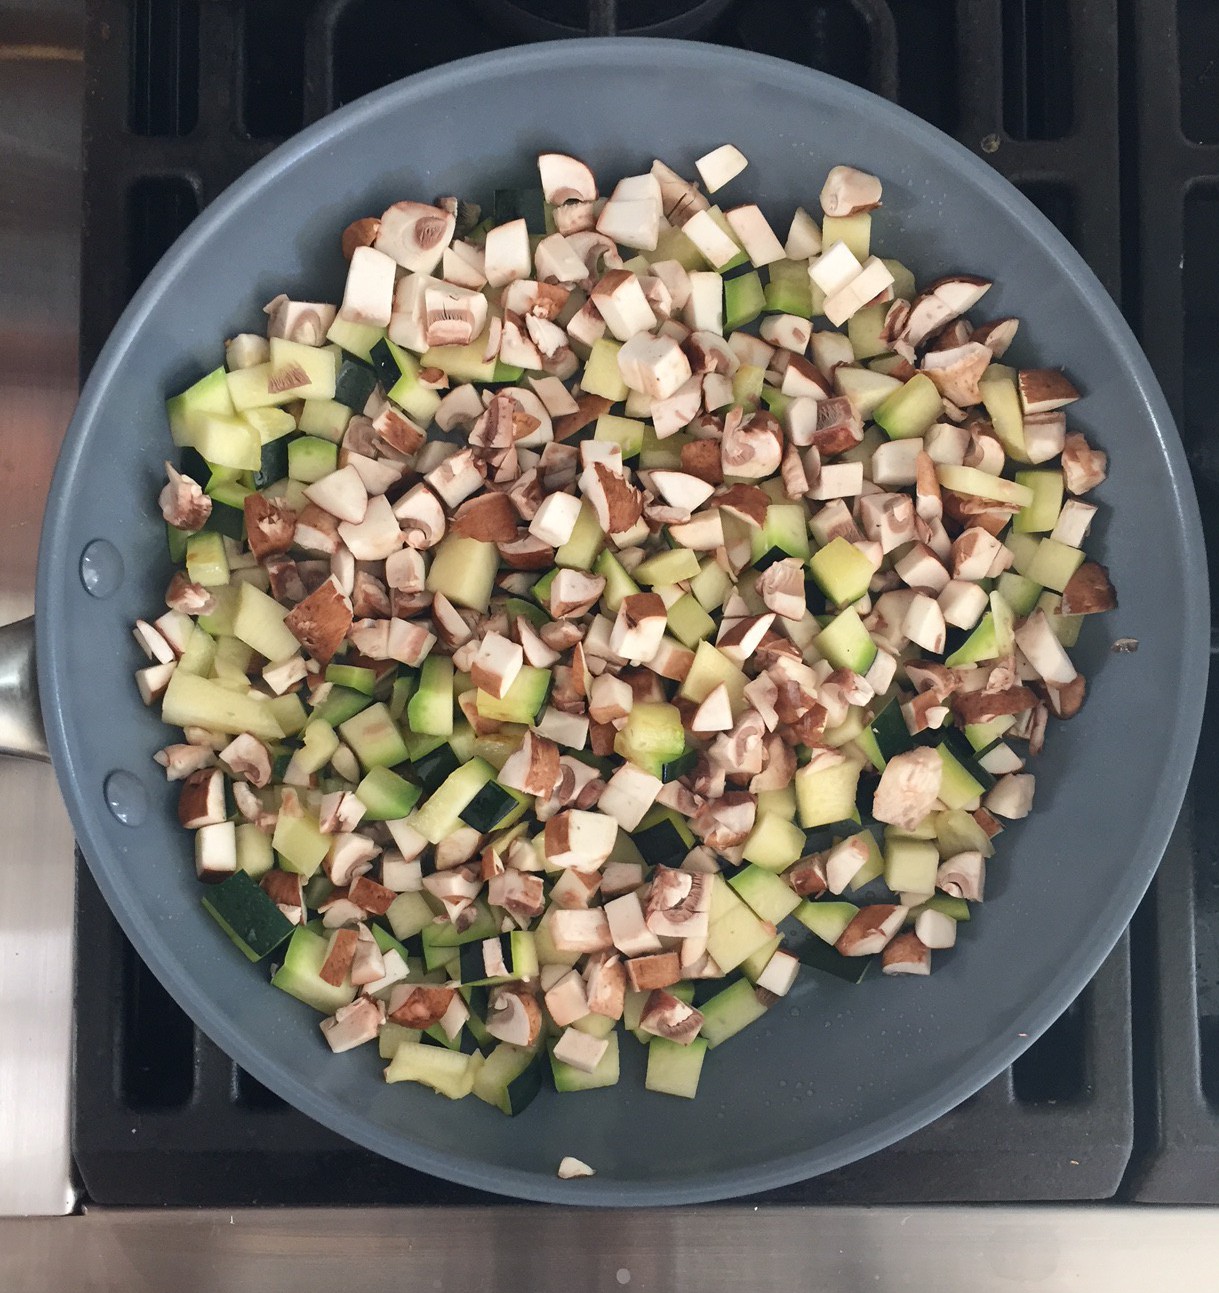
  • 1 cup diced zucchini
  • 1 cup diced crimini mushrooms
  • 1/2 cup chopped fresh cilantro leaves
  • 1 8oz can black beans, drained
  • 1 – 4oz can diced mild jalapeños, drained
  • 8oz grated light sharp cheddar cheese or mexican blend (about 2 cups)
  • Salt (approx. 1.5-2 tsp) and pepper (approx. .5 tsp) to taste
  • 12 – 13 fajita size tortillas

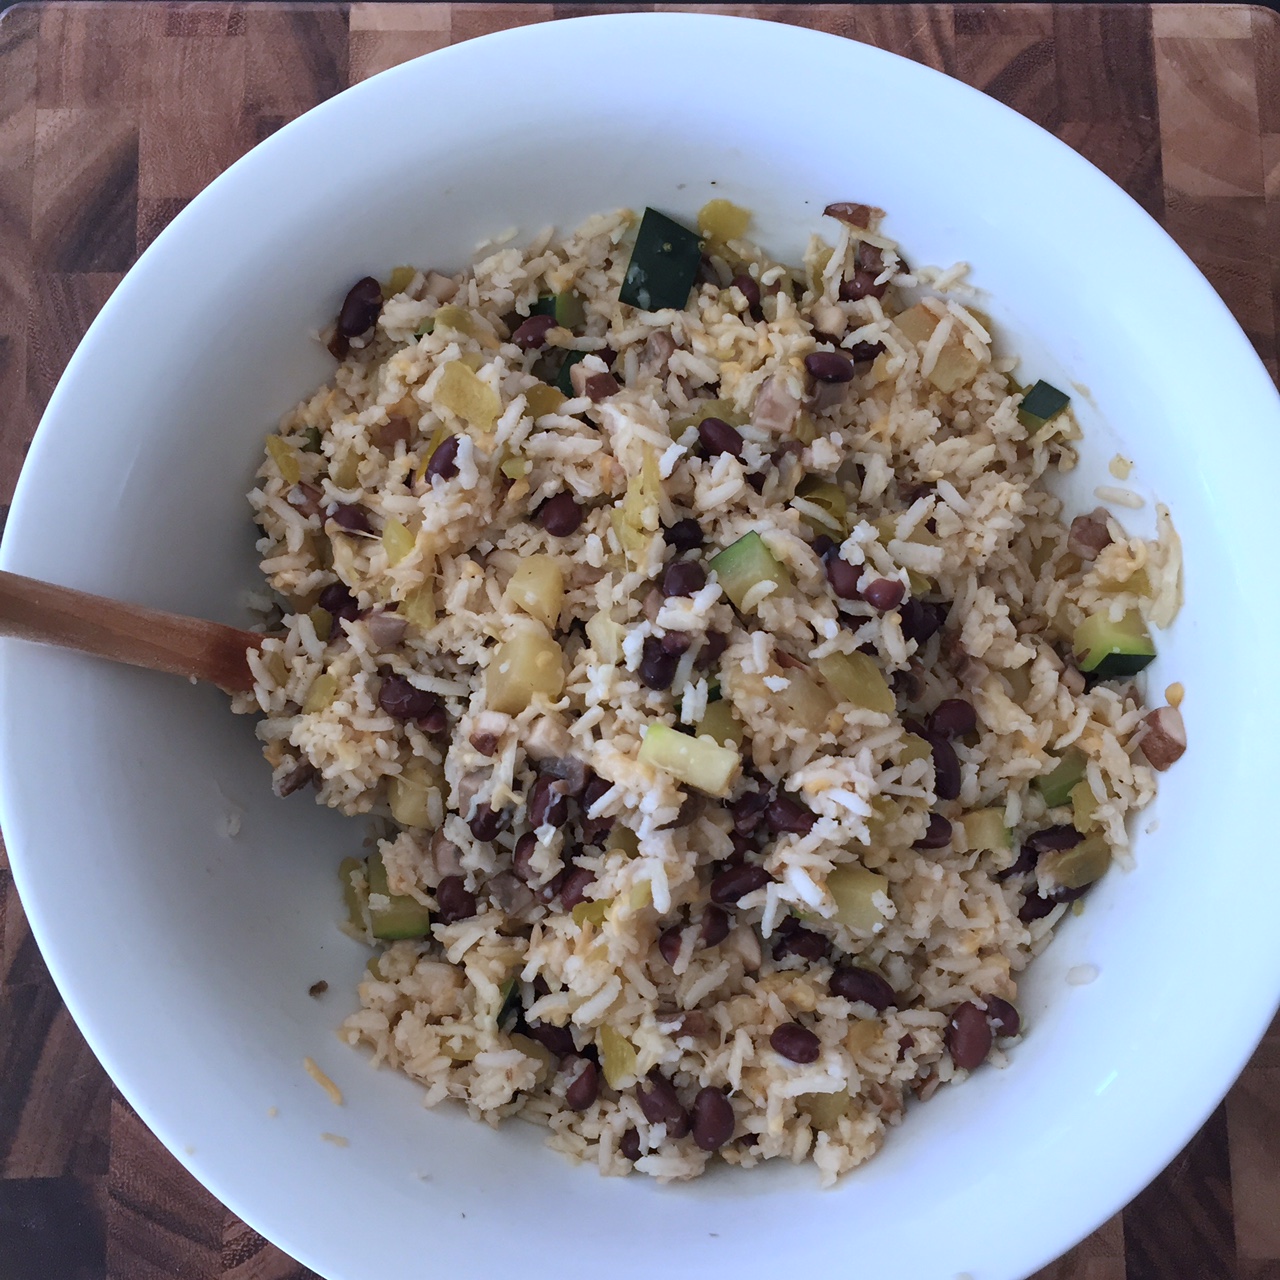
Saute zucchini and mushrooms over medium heat until softened about 5-10 min. Add zucchini and mushroom mixture to a large bowl with all of the cooked rice, jalapeños, cilantro, beans, salt, pepper and 1.5 cup cheese cheese.

img_6771

fullsizerender-5

Assembly:

In a 9×13 lasagna pan, spread 3 ladles full of sauce to the bottom. Add a half cup of rice mixture in each tortilla. Place folded tortilla fold side down in pan. I can usually only get about 8 enchiladas in a pan so I add the remaining to a 8×8 square pan (with a bit of sauce on the bottom as well) and freeze for later if I don’t need them. Pour remaining sauce over the enchiladas and sprinkle remaining cheese (you can add more if you like) over the enchiladas. Bake for 30-40 minutes at 350 F. until the tortilla edges are lightly browned. Cool for approximately 10 minutes before serving. You can top enchiladas with sour cream, cilantro, avocado, etc.

fullsizerender-4

Blackberry Crisp – So Good!

img_6160

I know, I know! I’ve been posting a lot of dessert recipes, particularly of the crisp variety. But I can’t help myself! Fruit and vegetables are plentiful right now and it’s the perfect excuse to rationalize my want for baking. We can’t let all this yummy food go to waste now can we?! And to my defense, I do make lots of dishes that aren’t dessert related, but the desserts photograph so much better I think 🙂

img_6073

We went to my mom’s last weekend and she has fruit trees and berry bushes beyond what any one family can devour (her blackberries are ginormous!). So I happily help myself and squirrel home my goods. And to this, I wonder why I have to workout so much…hmmm. Let’s think here…maybe give up baking!!!! Ha! That ain’t gonna happen 😉

This is my latest baking creation that I have to say is so yummy and comforting for this time of year. Still the essence of summery berries, but also the comfort of a fall crisp topping. I adapted this from one of Ina Garten’s recipes. Her crisp topping is the all time best, so it’s hard to stray from something so perfect and foolproof. The filling is what I came up with. Crisps and pies usually call for flour as a thickener, but I almost always use corn starch these days. It thickens better and doesn’t leave a floury taste to the dessert. Hope you enjoy!

Ingredients

9 cups rinsed blackberries
Grated orange zest of one orange
2 tablespoons freshly squeezed orange juice
1/2 + a scant cup granulated sugar (depends on how sour your berries are)
4 tablespoons corn starch

For the topping:
1 1/2 cups all-purpose flour
3/4 cup granulated sugar
3/4 cup light brown sugar, lightly packed
1/2 teaspoon kosher salt
1 cup old-fashioned oatmeal
1/2 pound (2 sticks) cold unsalted butter, diced

Directions

Preheat the oven to 350 degrees F.
Place the fruit in a large bowl and add the zest, juice, sugar, and corn starch. Pour into a 9 by 12 inch baking dish.

For the topping:
Combine the flour, sugars, salt, oatmeal, and butter in the bowl of an electric mixer fitted with the paddle attachment. Mix on low speed for 1 minute, until the mixture is in large crumbles. Sprinkle evenly over the fruit, covering the fruit completely.
Place the baking dish on a sheet pan and bake for 50 minutes to 1 hour, until the top is brown and the fruit is bubbly. Serve warm.

Apple Crumble – Gluten Free but sooo Yum!

IMG_5903

It seems these days I have a LOT of friends that have diet restrictions. All for various reasons and all different restrictions. It used to be that I was the one that was difficult to have over for dinner being a vegetarian. Now I’m pretty easy by comparison! Last night we had over one of my long time dear friends and her family for dinner. She is gluten, dairy and soy free (gulp!). We ended up dividing the meal between the two of us to make it easier on both, but I said I would make a dessert. More or less because my mom just gave me a box full of apples that are perfect for baking and I needed to start making a dent in them!

A crumble is pretty easy to get around the no dairy – just use coconut oil for the butter. The flour in theory is pretty easy because it doesn’t call for much and there is gluten free flour, which I thought I had but I didn’t. I love a good food challenge so I set forth on creating a gluten and dairy free apple crumble. I used my base recipe from Skinny Taste (love her!) and went from there. After making a few additions and substitutions, it looked amazing, but did it taste as good? After the meal was chowed, and the table cleared, we dished up the crumble with some dairy free coconut vanilla ice cream and OMG! It was super YUM! So I am sharing it here with you…and let’s be honest. If it turned out terrible, I would be silent as a mouse 😉 This is all that was left after we dished up and by the end of the night there were just a few small bites…and by morning there was none 🙂

IMG_5907


Ingredients

For filling:

  • 4 cups peeled, sliced cooking apples such as Granny Smith
  • 2 cups peeled, sliced slightly sweeter apple – I used Pink Lady
  • ¼ cup honey
  • 1/4 cup brown sugar
  • 1 Tbsp. fresh lemon juice
  • 3 Tbsp. corn starch
  • ½ tsp. ground cinnamon

For topping:

  • 1 ½ cup quick-cooking oats
  • ½ cup packed light brown sugar
  • ½ cup chopped pecans
  • 2 Tbsp. almond meal
  • ¼ tsp. kosher salt
  • 6 Tbsp. virgin coconut oil
  • 1 tsp. xanthum gum

Instructions

  1. Preheat oven to 325°F.
  2. Lightly spray 9” x 12” baking dish with oil.
  3. For filling: In a large bowl, combine apples, honey, lemon juice, corn starch, cinnamon. Pour the mixture into prepared baking dish.
  4. For topping: In a separate bowl, combine oats, brown sugar, pecans, almond meal, salt, xanthum gum and coconut oil. Sprinkle topping evenly over filling. Bake until browned and bubbling, 50-55 minutes.
  5. Serve warm.
    Serves 8.

Triple Berry Ice Cream

IMG_5797


My seven year old has been in the kitchen lately and she is doing a fantastic job. I’m not sure if she has a knack for picking recipes or if it’s her cookbook The Silver Spoon for Children, but so far she has made some really yummy dishes. The recipes are super simple, yet with sophisticated ingredients that are familiar and liked by most people. Particularly children! And the illustrations are fun to look at too! I highly recommend this for your kiddos.

This triple berry ice cream is…how do I say this?…A.MAZING!  I can usually skip ice cream to save a few valued calories, but this is worth it. So worth it. Here’s the recipe in case you don’t go out to get the book. But really, the cookbook is worth it even if you are not a kid.


Triple Berry Ice Cream

Ingredients

  • 1 Cup Heavy Whipping Cream
  • 3.5 Cups of frozen berries such as blackberries, raspberry’s, redcurrants or blackcurrants (I used Trader Joes mixed berries)
  • Half a Lemon
  • 1 Cup Super Fine Sugar

Directions

This recipe makes enough for 6-8 people.
1. Pour the cream into a big bowl and using a hand whisk or electric whisk, whisk until it holds in soft peaks-when you lift the whisk out it should look like snowy mountains (if you whisk the cream to long it becomes firm & stiff).
2. Put the frozen berries into the food processor. Squeeze the lemon juice over the fruit, add the sugar and whiz until mashed up.
3. Spoon the mashed berries into the whipped cream and carefully fold everything together. Spoon into a freeze proof container (I used a bread load pan)), cover and freeze for 3 hours or until frozen.


Two Ingredient Cookie Swirl Fudgecicles

IMG_5464

Summer has been off to a slow start here in the NW, but I am determined to make the most of it for my girls. I feel like having a cup of hot cocoa at times, but it’s summer. Right?! So the calendar says anyway. I’m deciding to listen to the calendar instead of the weather and with that advice, I made some super easy fudgecicles that require only two ingredients, a bowl and a whisk. Can’t get any easier than that!!

So here it is…Trader Joes Speculoos Cookie and Cocoa Swirl spread and chocolate almond milk. That’s it!!! And they make for a super yummy summer treat. Do you think if you eat enough fudgecicles summer will arrive out of pity for us? Oh and did I mention they only have 150 calories per pop?

Ingredients:

1/2 cup Speculoos Cookie and Cocoa Swirl Spread

1 1/2 cup chocolate almond milk

Directions:

Whisk cookie and cocoa swirl spread with 1/2 cup almond milk in a large bowl until smooth. Add the rest of the almond milk and stir until combined. Pour in popsicle molds and freeze for at least 4 hours.