Oatmeal Raisin Cookie Granola Bars

IMG_5362

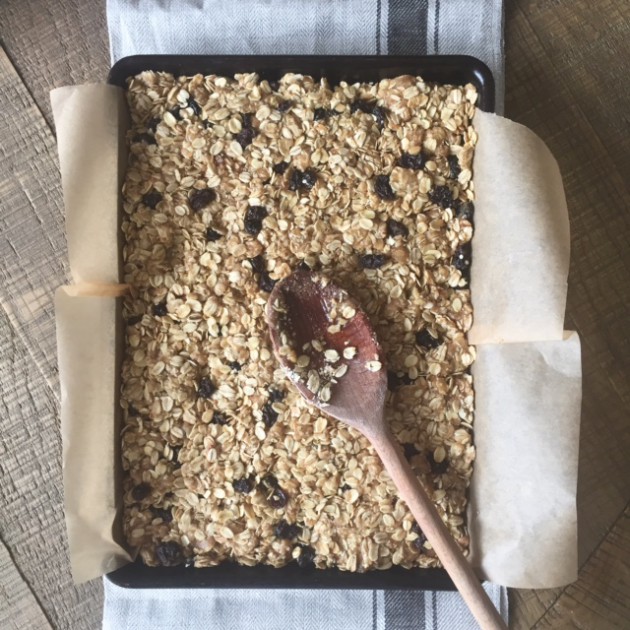
It was a granola bar kind of day around here – cloudy and kinda slow. I do a different variation of this recipe almost every time, but today I wanted to keep it simple and classic with the flavors of oatmeal raisin cookies. I have brought these bars to plenty of parks, picnics and play dates and I have never met a kid (or husband) that didn’t like them. They whip up super quick, make a ton and last for at least a week or more. A pretty perfect snack if you ask me.

Feel free to add in, swap or exchange ingredients. I substitute some of the oats for rice crispies, use coconut flour, add flax, hemp or chia seeds at times too (I did throw in a little hemp seeds in this batch!!). Dried cranberries, dates, apricots or cherries are also yummy alternatives. The one thing I don’t alter is the coconut oil. I tried several batches with butter and/or oil and they both fell apart or were too greasy. The coconut oil is perfect for melting and then solidifies when it’s cooled – plus it’s a healthy alternative and adds flavor. Have fun experimenting!

Ingredients

  • 4 1/2 cups rolled oats
  • 1 cup whole wheat flour
  • 1 teaspoon baking soda
  • 1 teaspoon vanilla extract
  • 2/3 cup coconut oil melted
  • 1/2 cup brown rice syrup (or honey)
  • 1/3 cup packed brown sugar
  • 1 tsp cinnamon
  • 1 cup raisins

Directions

  1. Preheat oven to 325 degrees F (165 degrees C). Lightly grease one 9×13 inch pan or line it with parchment paper.
  2. In a large metal mixing bowl melt the coconut oil over the stove top (very important it’s metal! Otherwise melt it in the microwave). Add brown sugar, brown rice syrup and vanilla and mix until combined.
  3. Add in the oats, flour, baking soda, and cinnamon and mix until combined. Stir in raisins.
  4. Press mixture into the prepared pan. Bake at 325 degrees F (165 degrees C) for 18 to 22 minutes or until golden brown. Let cool for 10 minutes then press down again with a flat surface (a measuring cup works great). Cut into bars. Let bars cool completely in pan before removing or serving.

Free Nature Scavenger Hunt Printable

IMG_5356

I was out with my girls yesterday and we found some local trails to explore. Normally, my seven year old is gung-ho to explore and my five year old is “too tired” to walk anywhere. However, to my surprise, they were both willing to see where the said trail led and we were off on a little unexpected adventure. It was a breath of fresh air (literally) to be outside in nature enjoying ever turn and corner with my two little ones. No one complained or whined and we kept going to see what we would discover. Even my five year old said she wants to do more trail walks…what?! OK!! To help keep interests alive, we made it an adventure to see how many different things we could find. We saw bunnies, a blue heron, ducks, flowers, creeks, bugs, etc. I think it’s so important for young ones to get out and see what is past their backyard. Fortunately in the Northwest, we are so lucky to have woodlands and forested areas just minutes outside any given neighborhood.

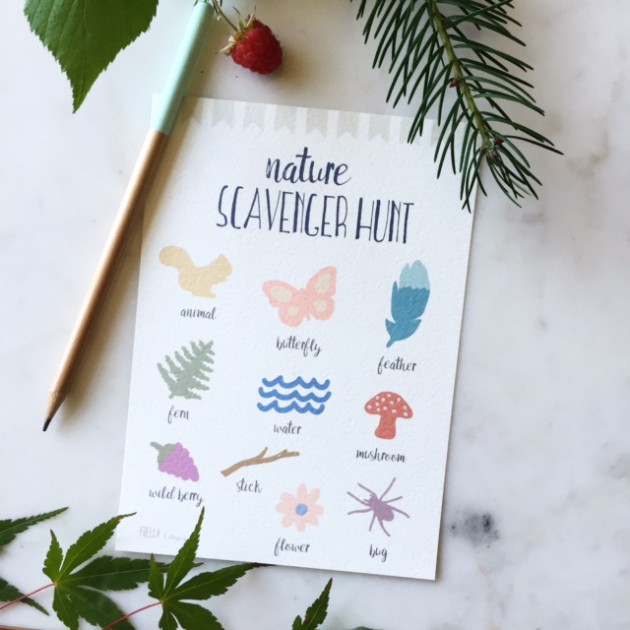
During our excursion yesterday I was inspired to make my own version of a nature scavenger hunt card. I was kid free this afternoon and had fun creating little illustrations for the printable. I rarely get several hours at a time to myself to create something fun just because. And here it is to share with you all…for free! Click here your free download and I hope you have many adventures this summer exploring your local trails with the little ones!


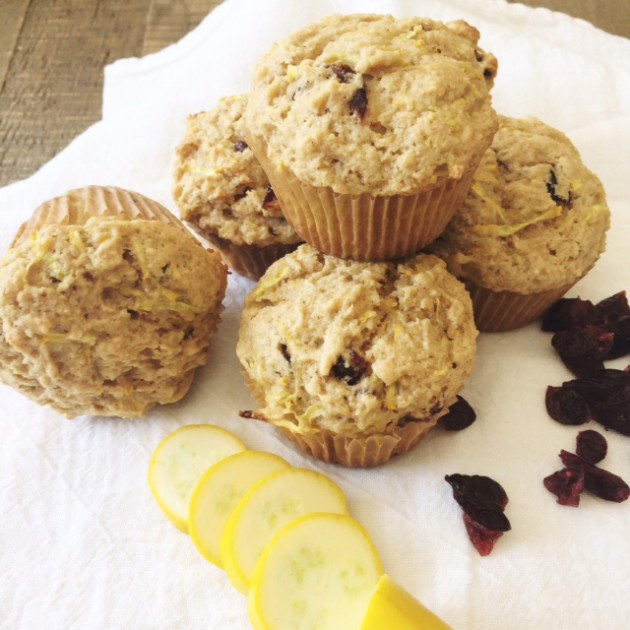
Yellow Squash Cranberry Muffins

IMG_5349

A few years ago I planted some yellow squash and it went gang busters in the garden. I made fritters with it, sauted it, roasted it, you name it. But I was at a loss of what else to do with it. So I found this recipe from CaramelPie and altered it to cut down on prep time and make them a little more healthful. And since the, they have been by far one of my favorite summer baked goods.

I just baked up my first batch of the season and they are just as yummy as I remember! Super moist, light and delicately sweet!

Ingredients:

15 muffins

  • 2 cups baby yellow squash grated
  • 2 eggs
  • 1cup melted butter
  • 1cup applesauce
  • 1cup sugar
  • 12  cup brown sugar
  • 2 cups whole wheat flour
  • 1 cup all purpose flour
  • 5 teaspoons baking powder
  • 1teaspoon salt

Directions:

  1. Wash squash, trim ends, and grate.
  2. Measure 2 cups of the squash, combine with eggs, butter, and applesauce, and set aside.
  3. Combine dry ingredients in a large bowl.
  4. Make a well in center of mixture.
  5. Add squash to dry ingredients, stirring only until moist.
  6. Spoon into greased muffin tins, filling 3/4 full.
  7. Bake at 350 degrees F for 18-20 minutes or until toothpick inserted in center of muffin comes out clean.

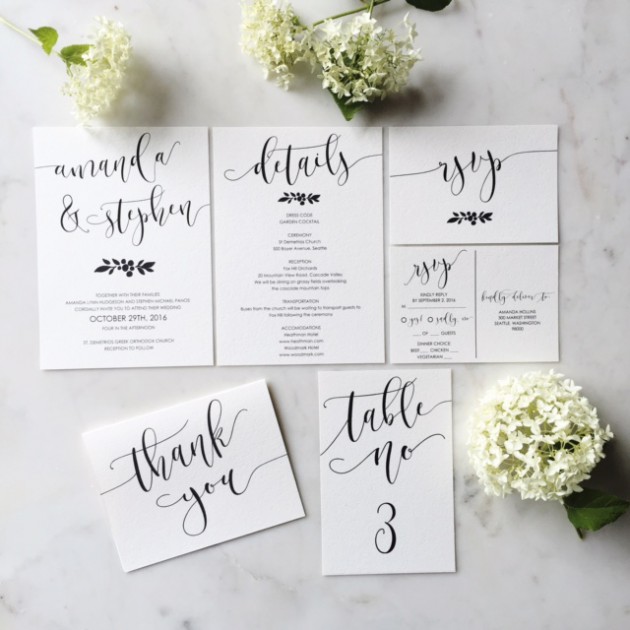
Modern Calligraphy Wedding Invitation Suite in Etsy Shop

IMG_5305

For years I have contemplated creating a wedding invitation suite, but always avoided it. As much as I love brides, I also was one once (in a distant past) and I remember how picky I was at the time and it has made me nervous that I wouldn’t be able to meet the particular demands. I have two young girls that are quite demanding in their own right, so I have needed items in my shop that are simple and straight forward. However, I do love including all of the accessory items that go along with an invitation…the table numbers, RSVP card, menu cards, etc. It just makes a wedding complete and wrapped up in a neat little bow. So with a little forward thinking and some tips from other Etsy Sellers, I think this pretty little wedding suite is customizable enough for the most particular bride. And the best part, I think, is that all of the items aside from the invitation, are editable by you. All the script text is static and the informational text is entered in by the user. I plan to add more color options in the future and maybe crack at some other designs…

My wedding was ten years ago (yikes!) and the style was way different back then. My colors were brown and green and for the time, I think our wedding was very elegant. Fast forward 10 years later and this suite of paper goods would be how I’d like my wedding to vibe. Simple, classic yet modern, black and white and not too fussy. I think that sums up my personality…maybe not quite if you ask my husband – maybe add in a little stubborn?! 😉 You can check it out on my Frella Etsy site here.

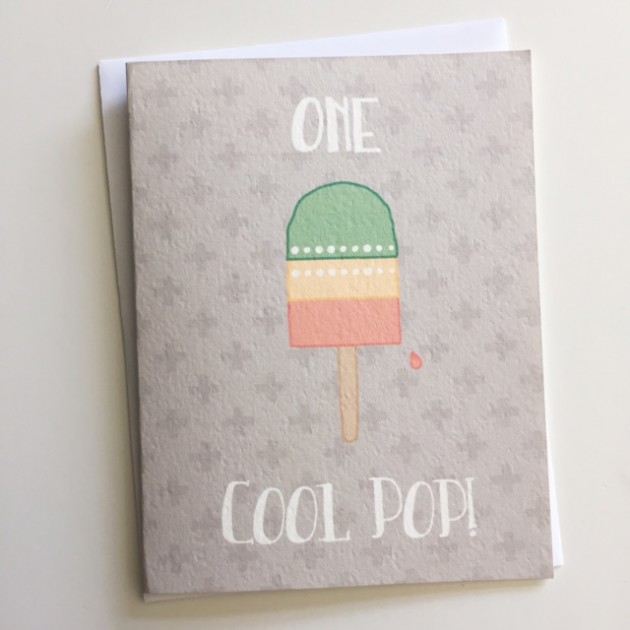
Father’s Day Card Free Printable!

Fathers Day_Cool Pop_Digital IMG_5276Father’s Day is just a few days away – can you believe it?! Time to honor those caring and loving Dads out there and tell them how much they mean to us. For the Dad’s who are the fixers, the playful dads, the encouragers, the providers, the wrestlers, and the ones who are the soft spot to land for our little ones, we say thank you!

Click here for your free printable Father’s Day card!

Summer Break Survival Guide

SummerSurvialGuide 2016


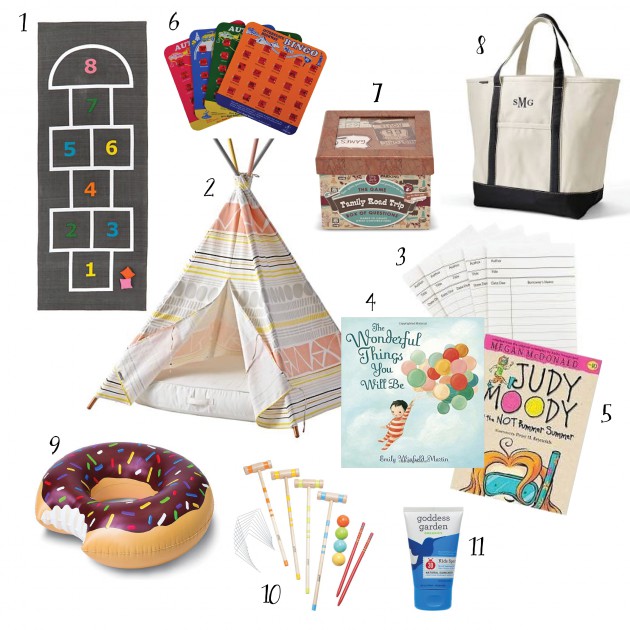
Is anyone a little freaked out about summer break and keeping the kiddos entertained for several months like I am? Well, this little survival guide might help whittle away some of those summer hours and provide some fun for all. I am ready (and my girls) for the break, the lazy mornings at home, the fun outdoor activities and even some rainy days indoors. That said, there will be days that everyone gets a little antsy. To ease some of those “ants in the pants”, I’ve put together some of my favorite things for summer that I personally use or are on my wish list, including the links where you can find them.

  1. For those rainy days, kids still need to get out their sillies and this hop scotch rug from Land of Nod is so darn cute.
  2. Every kid loves to build a fort and have a special place of their own. I’m always finding all sorts of toys set up in ours. Land of Nod has sooo many cute ones to choose from. The one shown is particularly adorable. Or even build your own with blankets and chairs! We’ve done that too 🙂
  3. Visiting your local library for books provides hours of entertainment and keeps those reading skills up for the next school year. Our library has a reading club (I’m sure most do!) kids can join and earn points the more they read. Take your budding readers to the library and sign them up for their own library card. They will be so proud to have a card of their own!
  4. The Wonderful Things You Will Be is currently a best seller with adorable illustrations and perfect for the my five year old.
  5. My seven year old is currently loving Judy Moody books. I’m not familiar with boys’ books series, so if you have suggestions of some fun ones, I’d love to hear.
  6. I’m sure most of you will be going on at least one car trip this summer. As much as I am thankful for ipads and dvds to occupy my kiddos impatient little minds, I also don’t want them to remember car trips as “free reign ipad” time. Auto Bingo is the perfect way to get everyone off the screen and looking out the windows at their surroundings. Some of my best memories of car trips are seeing an amazing rainbow, rock formation or waterfall. If our noses are buried in screens, we miss it all.
  7. Another car trip activity to get the whole family engaged is this Family Road Trip Box of Questions from Melissa and Doug.
  8. Summer isn’t complete without trips to the beach or water park. I don’t know about you, but I am always amazed at the amount of gear required to do a simple outing. The towels do take up the majority of the room, but you still need some beach toys, floaties, snacks, etc. This natural canvas tote from Lands End won’t let you down. I have the extra large size and use every inch of it! It’s sturdy, cute and a great price for what you get.
  9. Every beach/pool trip isn’t complete without something to float on and how fun is this giant chocolate donut?
  10. Hanging out in your backyard? Some old fashioned croquet will entertain the kiddos as well as the parents. I love the subtle colors of this Coleman set from Target.
  11. Last, but not least, summer can’t happen if you don’t protect your little ones from the sun. Goddess Garden makes a great sunscreen for kids without any of the harmful junk and at a great price point. It rates very high on the EWG website so you can rest easy that your kids are protected from the sun, as well as not getting any harmful extras.

Have fun this summer and find some adventure! We plan on taking it easy for a bit after school gets out to refresh. After that, it’s going to be beach, camping and maybe try a short hike. And of course visit the cousins in Colorado. What adventures do you have in store this summer?!

Chocolate Almond Spread – So Good!

IMG_5169


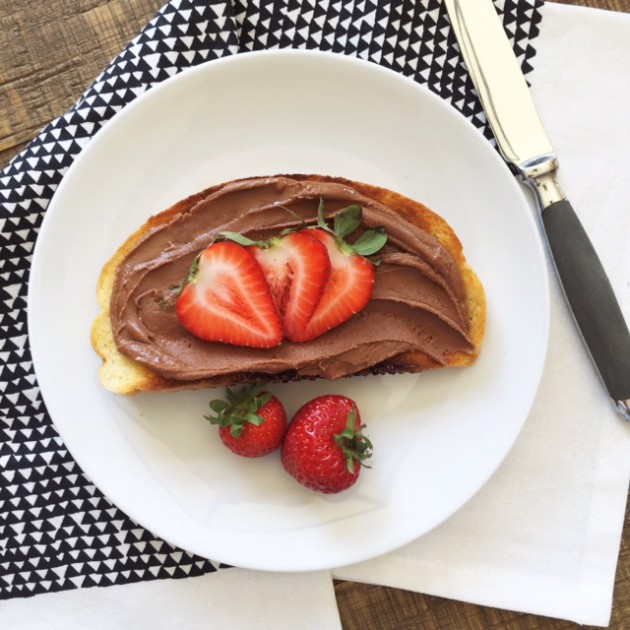
Oh my goodness ladies and gents! Who doesn’t like chocolate spread?! And if you are like me, you would prefer a healthier version of the said “Nutella” version. This recipe could easily be used with hazelnuts for a more authentic Nutella taste, but I love it with almonds and so here is my version. It’s so easy to make (especially if you have a Blendtec or Vitamix blender) and you can eliminate some of the guilt when bribing your kiddos with some chocolate on their toast! Made with healthy coconut oil and almonds, it’s heavenly on toast topped with berries, sandwiches, inside/on top of muffins, used as tart filling, etc, etc. There is some sugar in there, but I reduced it as best as I could and still maintain some of the sweetness.

I’m trying to be good, but I can’t help but “clean” the knife when I am making the kids sandwiches! Stay tuned for a freebie Father’s Day card next week and take a peek at my Holiday card in the previous post…it’s up for voting on Minted (link to vote in post)!!! Eeck!

Ingredients

2   cups toasted almond slivers
12  cup coconut oil, melted
12  cup cocoa powder
1   tsp vanilla extract

3/4 cup powdered sugar

Directions

  1. Add coconut oil and almonds to blender and secure lid. Blend on a low speed for 15 seconds and then increase to a high speed for 35 seconds.
  2. Stir mixture towards center of jar, then secure lid.
  3. Blend on a medium speed for 50 seconds more.
  4. Add cocoa powder, vanilla extract, and powdered sugar to jar and secure lid. Blend on a medium speed for 50 seconds.
  5. Store in an airtight container in the refrigerator for 4-6 weeks. Bring to room temperature before serving.

Vote on Minted

Merry Christmoose
Hey there friends! A little confusing seeing a Christmas card in June, right?! Well, I finally got around to submitting my first design (and hopefully not the last!) on Minted. It’s an awesome site for designers to submit their artwork and be voted by the people. And if your submission is one of the top voted, your design gets to be featured on Minted for consumers to purchase. Win, win in my books! But of course, they need to be ahead of the current season and ready for the next, so their holiday non-photo card competition just started it’s voting process. There are sooooo many talented artists out there. I respect and admire them all, but if you feel so inclined, a vote in my direction would be oh-so appreciated!!! Click here for my design. Many thanks for your kind efforts!!

Easiest Limecicles Ever!!

IMG_4996

I don’t know about you, but there is something about making treats and desserts for my kids and husband that just makes me feel good inside. Maybe it’s because it’s my way of showing them I love them and care. Or maybe because it takes me back to a time when I idealize a simpler life. Don’t get me wrong, I’m all about shaving off minutes of my day by picking up ready made at the store. But when I have a moment, I love making treats and snack for my family.

I digress…Are you ready for the easiest, and might I add, yummiest limecicles ever?! My girls love these time and time again and they are by far their favorite of the rotation. I found the recipe from Girl vs. Dough (love her site!) last summer and with a little tweak (more lime!!), I made them continuously throughout the season.  I have recently pulled the recipe out of the archives already for this year. With just three ingredients and a freezer, you will with out a doubt be the “cool” mom 😉

Limecicles

Recipe adapted from Girl vs. Dough

Prep Time: 

Total Time: 

Yields About 12 (3oz) Popciclces

Ingredients

  • 2 cups milk (I used 2%)
  • 1 cup fresh lime juice (from about 8 to 10 small limes)
  • 1 (14 oz) can sweetened condensed milk

Directions

  1. Pour milk, lime juice and sweetened condensed milk into a large bowl; stir until well combined.
  2. Pour mixture into popsicle molds; place a popsicle stick in the center of each mold.
  3. Cover and freeze at least 8 hours or overnight. To easily remove popsicles from the mold, dip the mold in a bowl or container of warm water for 10 to 15 seconds.

Dressing for Disneyland

We did it! We finally went to Disneyland with the kiddos this week! My husband and I are not natural Disney goers, but we both never went as wee ones and knew we wanted our girls to experience it when they were young to capture the magic. Because, let’s just say, when you go for your first time as an adult, you see past all of the smoke and mirrors 🙁 We surprised the girls at 5:30am and told them to grab their stuffies, we are going to Disneyland. My oldest didn’t believe us and quickly proceeded to go back to bed, but with a little pinky swearing we convinced her we weren’t pulling her leg!

IMG_4970

Jeans: Gap; Shorts, Sneakers and black top: Banana Republic; Birkenstocks: Nordstrom; Cream Top: Ann Taylor; Hat: Target

Soooo, my take on Disneyland? I won’t go in to too much detail since this isn’t what this post is about. But I will say, I am glad my girls got to experience it. It was crazy insane at times with tired legs and a massive headache, but to see the look on their little faces, was enough to make it worth while for me. We made the most of our time there and went like gangbusters. Let’s just say, I’m happy to have this Sunday to relax and recoup before our normal crazy week commences. That said, I am surprised at how well I packed. I was comfortable, but also didn’t feel like I could meet up with friends with my head held high 😉 Here is a photo of the main basics I packed. Notice the mostly dark colors to hide any unsightly stain you might pick up? And two pairs of comfy shoes in case one gives you problems. I rotated my shoes so my feet never got too bad with one. A light jacket, jeans, and a hat in case you needed to make a quick coffee run in the morning before getting ready…oh yes, and for the sun! I also through in a pair of shorts that were airy in case it was super hot. I did use them by the pool, but our weather was never super hot. Below are a few extra details and pictures of the beginning part of our trip and Disneyland (might I add that it’s super hard to get cute pictures with everyone and their mother in it as well!!). My personal fave!

IMG_4973

Miss Piggy!

We spent the first day and a half in Burbank for my husbands work. We got to tour the Disney studio lots and I have to say this was my favorite part of the trip. The history behind Disney, how perfectly manicured every nook and cranny was and the attention to detail on the lot was inspirational. You could see the legacy Walt had left behind.

IMG_4976

Every walkway on the lot is interesting to tour

IMG_4977

All the buildings are perfectly old school and perfectly maintained

IMG_4972

The seven dwarfs holding up the building

We took a quick road trip to Santa Monica for the girls to get some silly’s out. And despite the cold and grey skies, the girls didn’t want to leave. Then before heading to Disney, we took a quick side trip to Blue Bottle Coffee. I’m telling you…awesome coffee! I wanted to hang out there and be the inner hipster I feel I truly am. Alas, my two kiddos and the spilt coffee all over my sweater made us leave and come back to reality. Disneyland is where we were headed and no matter how much I didn’t want to go, the stars (er, spilt coffee) were pushing us there.

We have this at home and it was fun to see the coffee shop - SUCH. GOOD. COFFEE.

We have this at home and it was fun to see the coffee shop – SUCH. GOOD. COFFEE.

IMG_4971

Someone is having fun in the sand!

Disneyland

…hard to get good pictures without crowds here so I apologize for the lack of and poor quality


IMG_4974