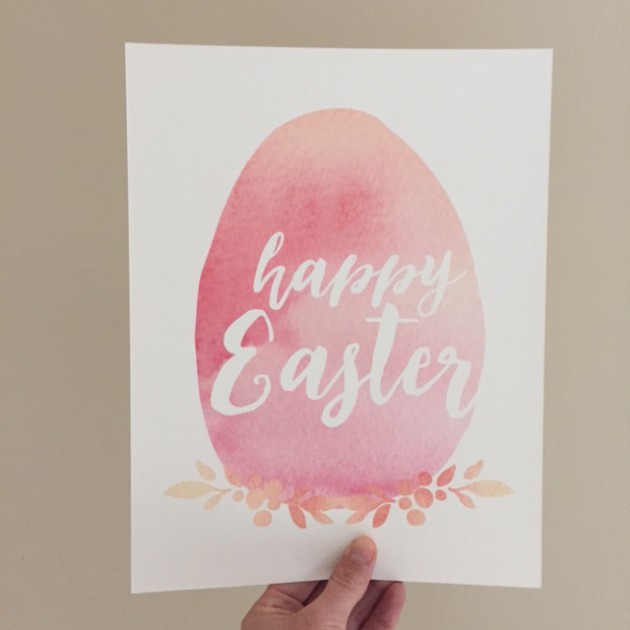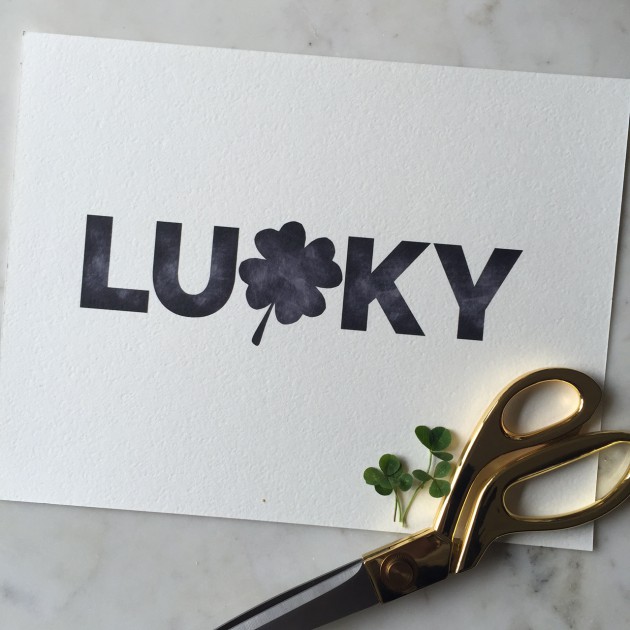
Tomorrow is St Patty’s Day and although I am not Irish, I have always felt a kinship to the Irish because of my red hair – us red heads must stick together! 😉 To celebrate tomorrow and for a little treat, I put together a simple art print you can download for free! Enjoy!
Cocoa and Cookies Birthday Party
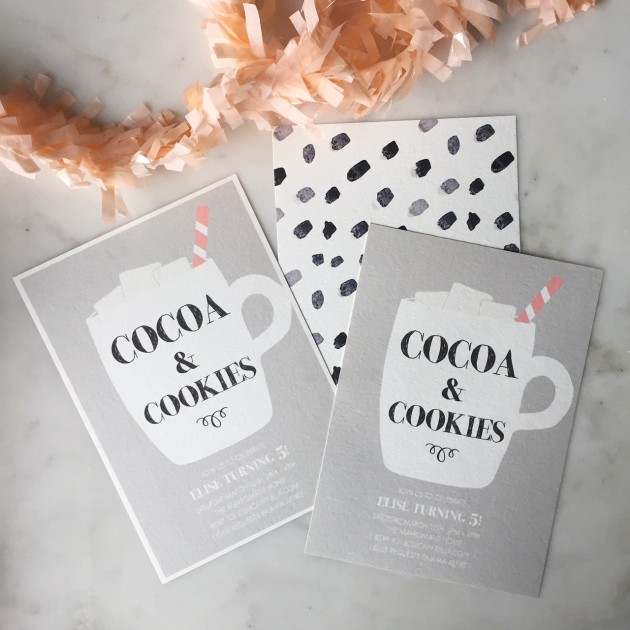
I’m over the birthday party hump with both of my girl’s birthdays under wrapped – phew! My five year old was stuck on having hot cocoa, pajamas and a puppy movie for her birthday party so I tried to tie it together with a Cocoa and Cookies theme (…and where your PJ’s!). I kind of phoned this one home this year with everything we’ve had going on these last few months, but she seemed pleased with her party and the little touches I did do, I think turned out pretty cute. Here are a few pictures of her party.
I was indecisive about having a white border or not on the invitation (see above) and in the end I went with no border. I added a coral colored straw because I’m well aware that cocoa and cookies for a birthday theme in March is not exactly seasonal 😉 and in the end I went with no border.
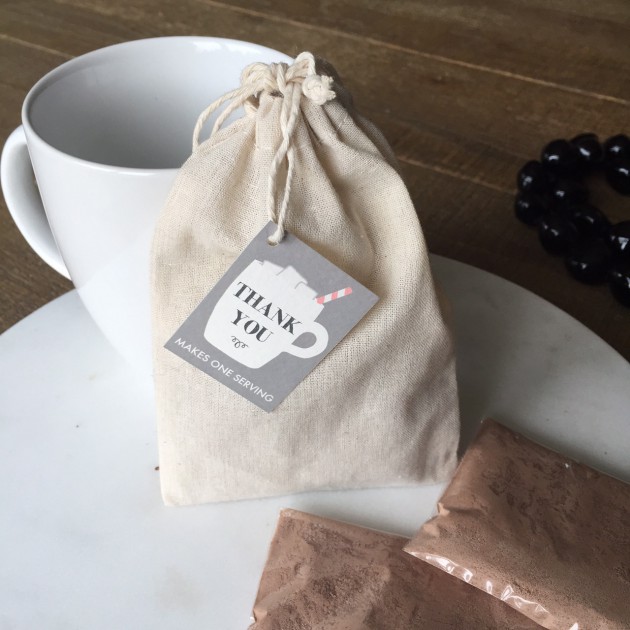
I designed little thank you tags for the homemade hot cocoa and cookies the kiddos took home. Simple and certainly inexpensive. Yahoo!
This number 5 balloon was from her actual birthday the week before, but it survived a week and a half later…barely!
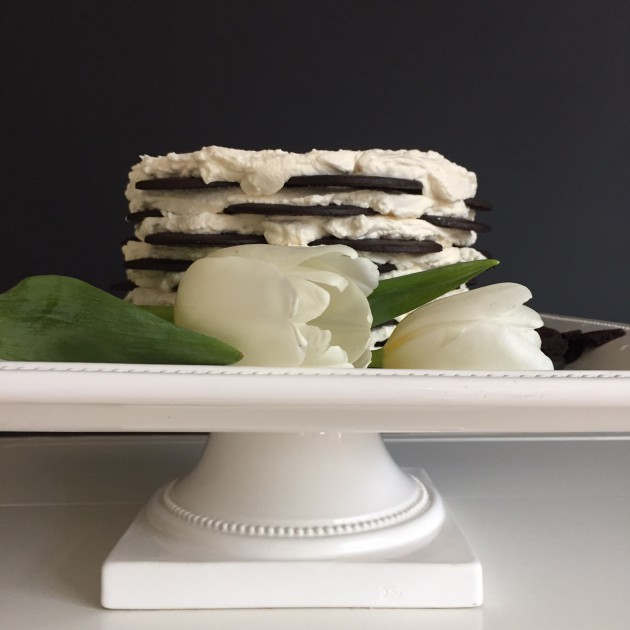
My attempt at a icebox cookie cake. It didn’t turn out exactly like my #magnoliabakery inspiration cake, but it was a worthy effort 😉 Cake decorating is certainly not my forte!! But it was delicious!
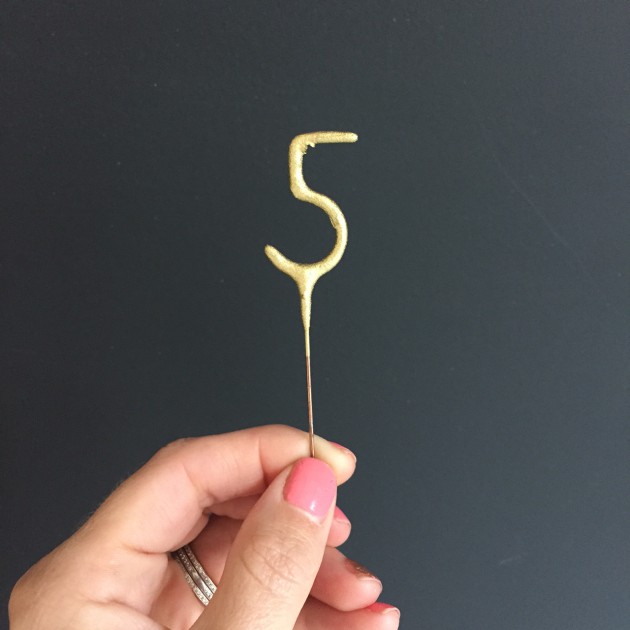
I’ve fallen in love with these adorable sparkler candles and it adds a fun surprise to the cake!
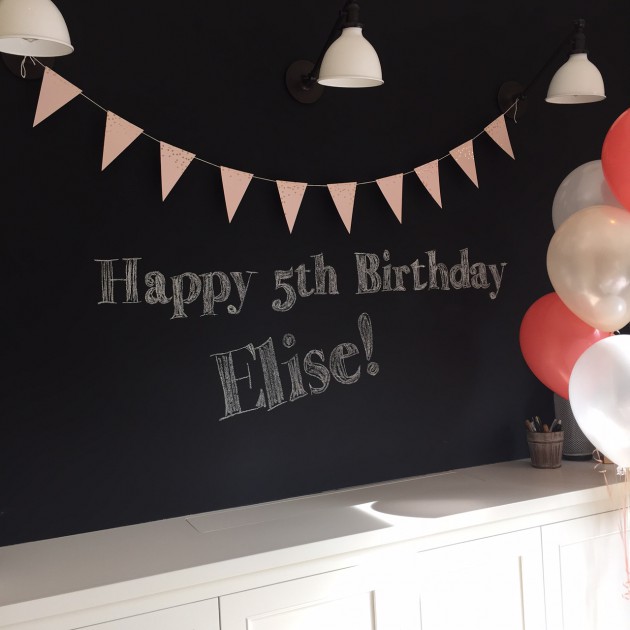
Finally making use of our chalkboard wall we have! My husband does a great job at projecting the text from his mini projector and then tracing the text so it turns out level and in the font I want.
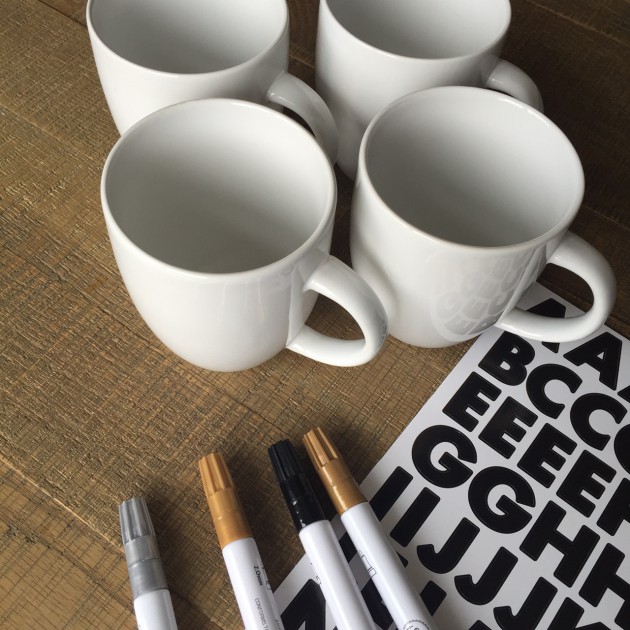
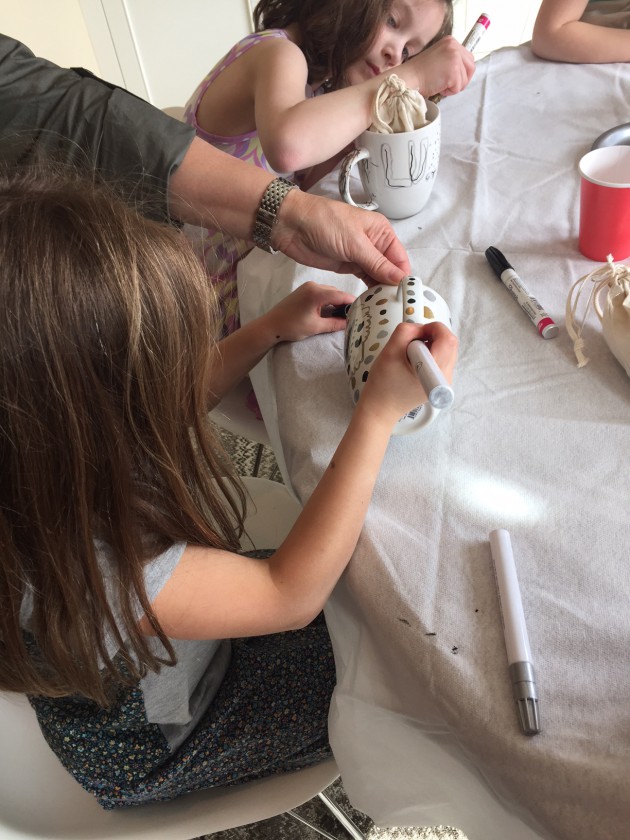
The kids got to decorate their own mugs with a monogrammed letter and take them home with them along with their hot cocoa and cookies goodie bag.
The two older girls hard at work on their mugs. I wish I got more pictures of the table before it got all messy, but the sun was shining in so brightly that it was hard to see beyond all of the shadows. Oh, and lastly, the kids dropped marshmallows from a chair in a mason jar. They all said how simple it would be, but it was harder than it looked and they all had to eat their words!
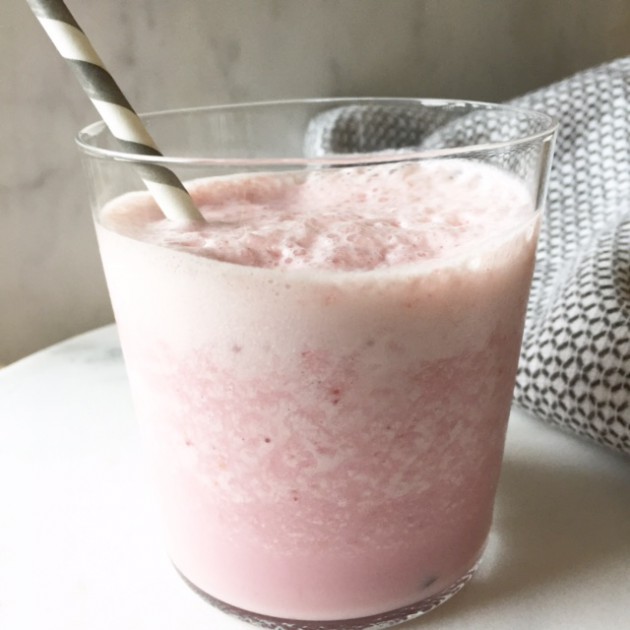
Strawberry Milk – Moms, You Can Say “Yes”!!
What kid doesn’t want strawberry or chocolate milk? And what Mom doesn’t dread saying “no” to yet another treat? I had a lightbulb go off recently and thought, why not just blend strawberries with milk to make actual, real, authentic strawberry milk?! Seems so obvious, but a foreign concept at the same time. So I got out my try trusty blender, added some strawberries aaaaaaand…sort of bland 🙁 But I’m not one to get discouraged and waste perfectly good strawberries so easily. I ran my thinking hamster around in my head and decided a dash of (real) maple syrup might do the trick, but also keep the healthy factor in tact. And wouldn’t ya know?! It’s delicious and my daughter loves it. Store any extra in the fridge for a few days and pull it out for an extra special treat you can feel good about.
No recipe is needed really. Just add a container of strawberries to about 16-24 ounces of milk with a tablespoon or two of syrup, blend, and you are good to go! Enjoy being a cool mom once again!
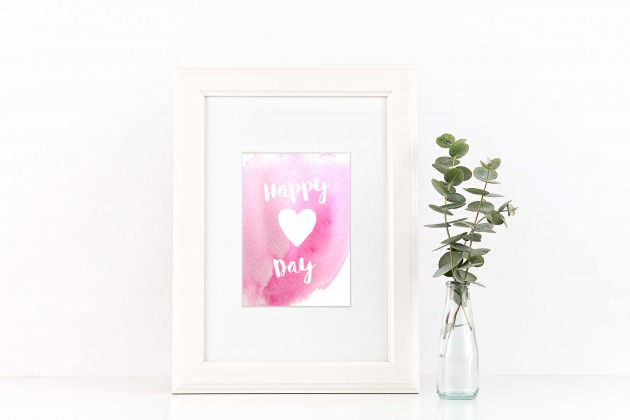
Valentine’s Day Water Color Art Print Freebie! XoXoXo
Another freebie for Valentine’s Day! A quick little 5×7 art print this morning to celebrate a “lovely” time of year! Hope you enjoy 🙂
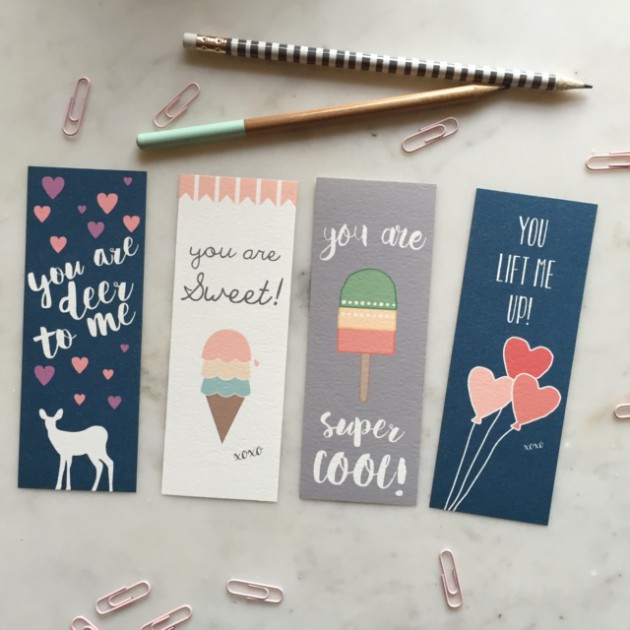
Valentine Class Bookmark Cards – Free Download!!!
With sick kids, half days and a multitude of other unplanned stuff in our schedule, it’s been taking me longer than I would have liked to get these valentine bookmarks finished and shared for a valentine freebie! But, alas, I finished {sigh}.
I really try to limit the trinket quota in our house, but it always seems to be a loosing battle. However, I trudge on and hope someday my house will be a trinket free zone (wishful thinking, right?). That said, for valentine’s day, it’s a mecca of trinkets and so in the past I’ve just done some simple valentine cards (see my Etsy Shop) with a lollipop taped to the back. For fear my kids will get bored with my noncreative valentine efforts (however, I thought their cards were pretty cute, but kids could care less about the design…it was for me 🙂 ), I decided to create some valentine bookmarks. Not as exciting as candy, but my mom conscience feels much better about it! So here you have it…they are a free download for the next week and then they will be available on my Etsy Shop for purchase after that. Just print (on card stock), trim and write on the back and you are finished! Enjoy 🙂
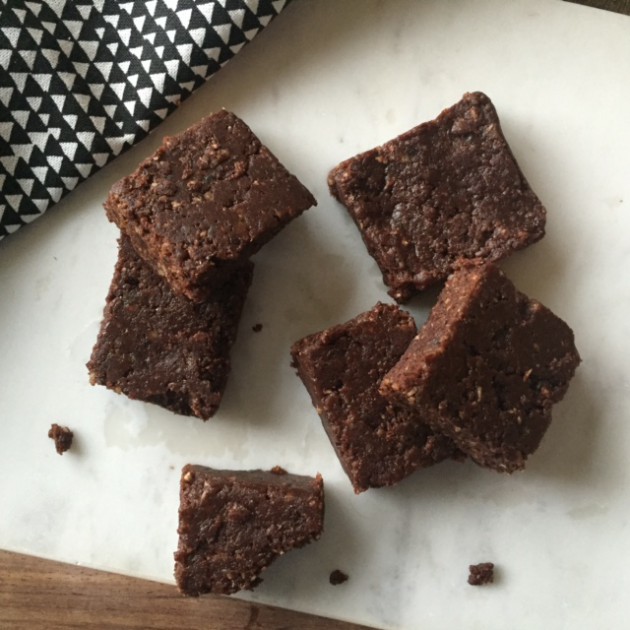
No Bake Raw Brownies: So Yum…and healthy!
If you haven’t tried raw brownies yet, you have to. They are the easiest and yummiest healthy brownies you can make. I’ve made my fare share of “healthy” brownies and these are by far my favorite. Yet this time, on a whim, I decided to throw in a tad of unsweetened coconut and I don’t think I can go back to making them without. Delish!
Here’s the recipe:
Ingredients
- 2 cups raw walnuts
- 11 madjool dates, pitted
- 1/3 cup (60 g) cacao powder or unsweetened cocoa powder
- 1/4 cup unsweetened shredded coconut (optional)
- 1/2 tsp vanilla
- 1/4 tsp sea salt
- 2 tsp water
Directions:
1. Place walnuts in food processor and process until finely ground.
2. Add the dates and sea salt and pulse to combine.
3. Add the vanilla, cacao powder and coconut to the food processor and process until small bits remain.
5. Process until a dough consistency is achieved, adding the water and/or more dates if the mixture does not hold together when squeezed in your hand. Y
6. Add the brownie mixture to a parchment lined loaf pan. Press down with hands until it is flat and firm.
7. Place in freezer or fridge to chill for 10-15 minutes before cutting into 10 even squares.
Pajama and Pancake Birthday Party
It’s been a few weeks since my daughter had her birthday, but shortly after we dashed off to Hawaii (can’t complain!!!) and now we are back to the daily grind of life. I’ve been anxious to post about Vivienne’s birthday party. I thought it turned out so cute, but I must apologize for some of my pictures. I am by no means a professional photographer nor do we feel it necessary to hire one for a kids party. Every thing we do, we do it ourselves…except for the cake. I’ve learned my DIY limits and cake decorating is not my thing 😉
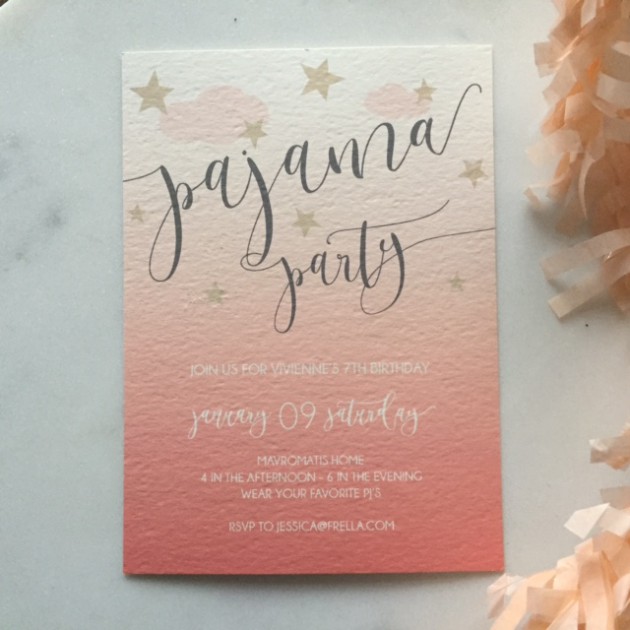
After a year long conversation of Viv telling me she wanted a pirate party, a few weeks before I needed to send out the invites, she threw me a curve ball and said she wanted a slumber party? “A wha, wha?!!” I said. Me not being ready to host a sleep over with a bunch of six and seven year olds, seeing disaster in the making, years off my life and no sleep, I gently suggested a pajama party instead with breakfast for dinner (who doesn’t love that?!). She was sold! Amen to that! So I had a few weeks to rethink party ideas and come up with a game plan and here you will see the results with corals, peaches and golds as the main theme.
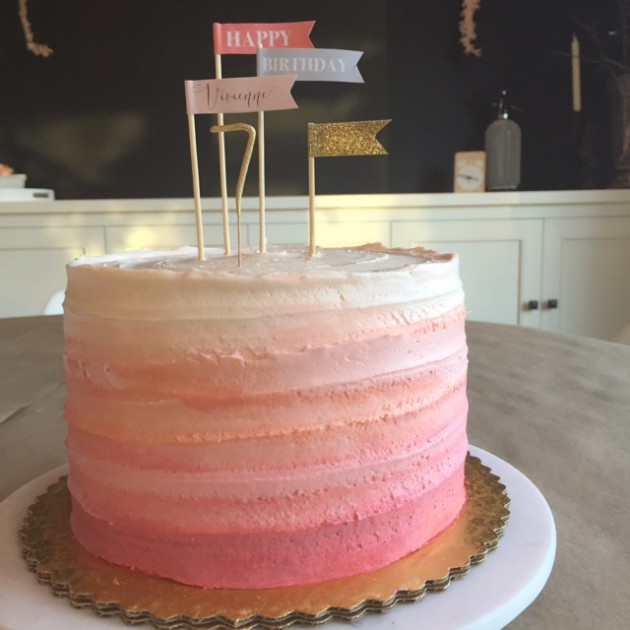
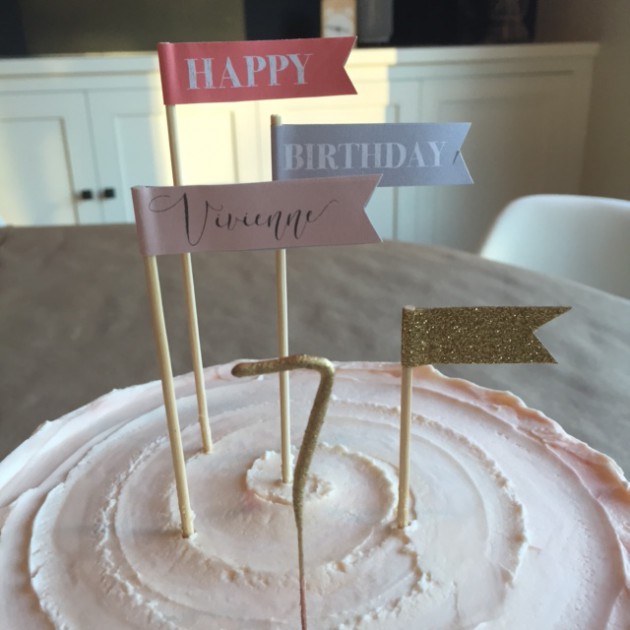
To keep with the ombre theme of the invitation, I had our local store do an ombre cake which I thought they did a fantastic job and much better than I could have ever attempted. Then I topped it with some sticker flags and gold washi tape I whipped up along with a #7 sparkler candle.
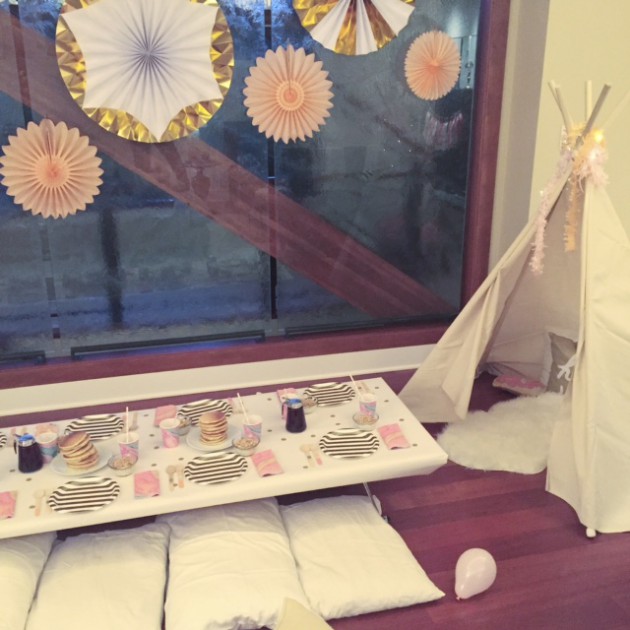
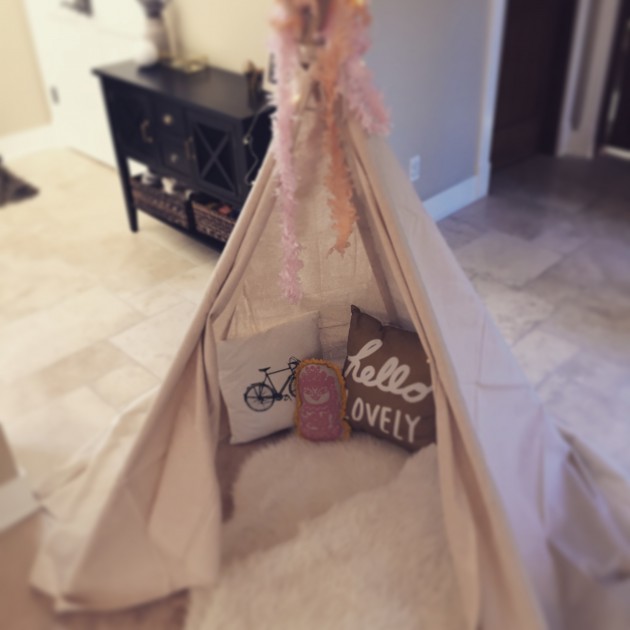
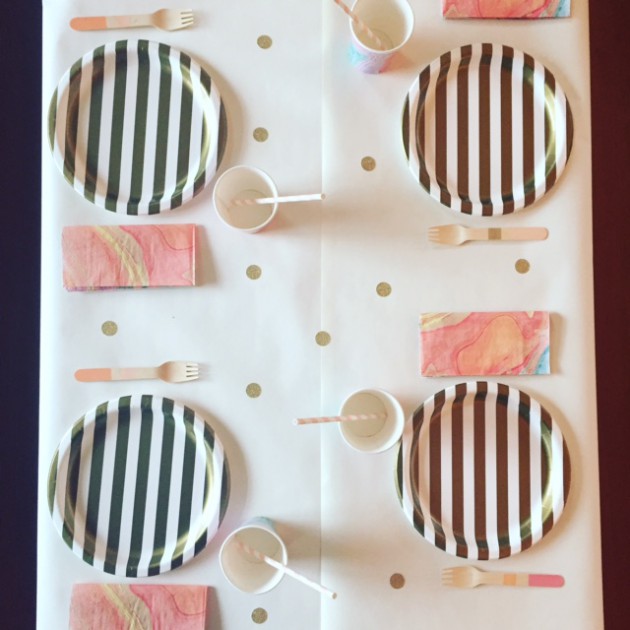
To set the scene and create an intimate, cozy atmosphere, I used a low table covered with white kraft paper and gold sparkle stickers. The kids sat on pillows and ate pancakes, fruit and yogurt parfaits…talk about sugar overload!! On either sides of the table, I had a teepee with faux sheep skin (#ikea) rugs and pillows inside. I already had one teepee I had made years ago, but I wanted one more without the effort of cutting and sewing. So with a little Google help, I saw some no-sew ideas and came up with my own take. Talk about easy!! Just using some 6′ wood dowels, a painters drop cloth and a few pushpins and you are good to go!! I also topped the teepees with some tissue garland and what I call “fairy lights” I had picked up a while ago from the #target dollar bin. That place can be a gold mine if you check regularly. Finally, we have a glass panel wall that I used to hang some gold and peach pin wheels as a back drop. Super cute!!
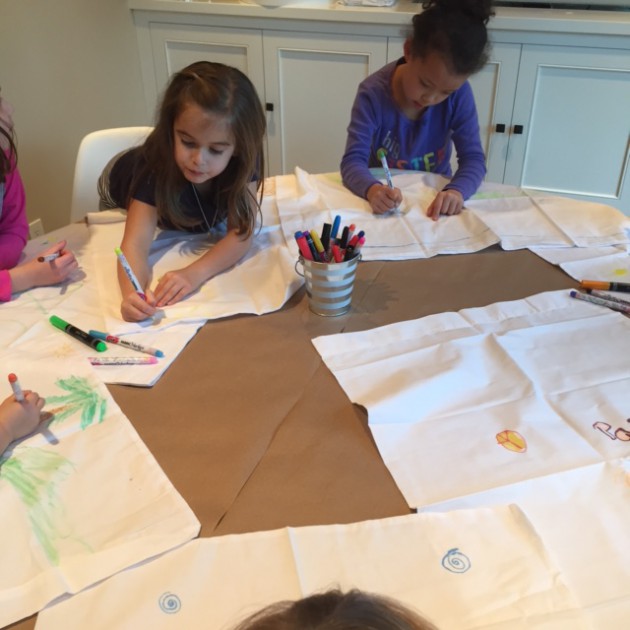
For activities we had a donut from a string eating contest (that was a big hit!!) and then the kiddos decorated their own pillow cases with fabric markers. It kept them busy for quite a while and it was fun to see what they came up with.
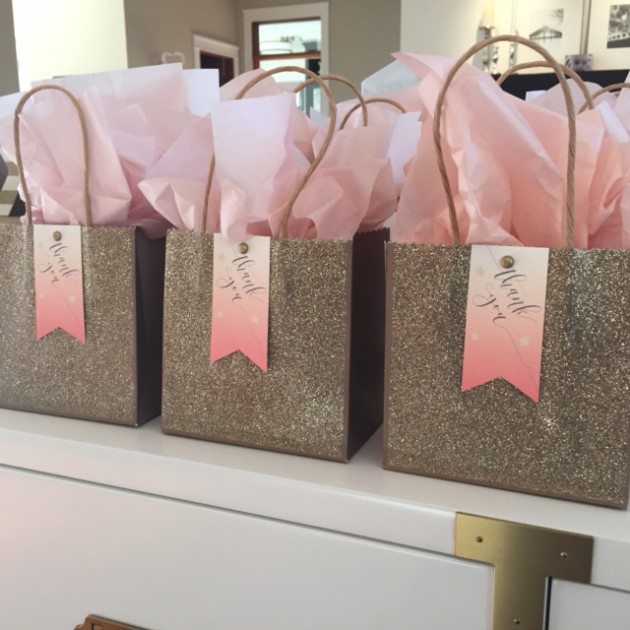
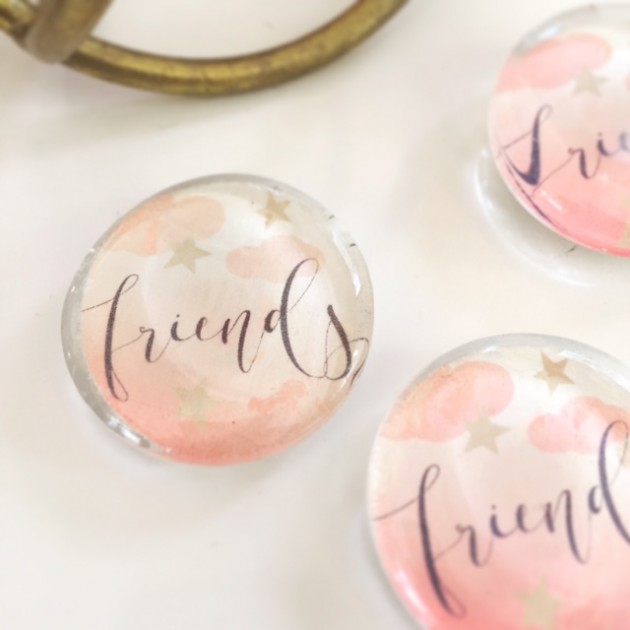
Finally, for the favors, I found these sparkly gold bags from (again) the Target dollar bin that I dolled up with some Thank You tags and filled them each with a peach colored bracelet, some donut shaped soap from Etsy, and these glass magnets I made that coordinated with the invitation. Over all I think all the kiddos had fun and who doesn’t like hanging out in your jammies?! To take one for the team, I even wore mine and I have to say, it’s the most comfortable I’ve ever been at a party 😉
*Most of the party supplies were from Shop Sweet Lulu and Target
**If you have any questions about how I created or styled some of the party items, I am happy to answer!
Protein Packed Sunflower Butter Muffins…Yum!
Well hello again! I disappeared there for a bit over the Christmas break. I posted a few inspirations on Instagram, but I was otherwise engaged with hanging with the family folk for the last few weeks. I have to say, it was nice to slow down, not rush out the door and just hang in our jammies if we so chose. Not to give an entirely wrong impression that we did nothing but hang out in our pjs slothing about. We did venture out of our hollow up to visit the snow, downtown to see the gingerbread houses and then a dismal attempt at driving around to find Christmas lights and ending up in a gas station bathroom (ewe!!).
Now that the merriment of the holidays are behind us, we’ve stretched our pants to capacity and dawned our nightwear sufficiently during the day hours, it’s time to get back on track. Exercise, stick to a schedule and eat healthy…but still eat yummy food of course!! The Christmas cookies are in the past and I am inspired to start thinking of some healthier options for my little peeps that they will actually eat. So I went to my “High Protein Vegetarian” cookbook and found these bad boys that I hadn’t tried before. Partly because my oldest daughter only likes almond butter and my youngest only likes peanut butter…hmph 🙁 But a lightbulb went off last night and I thought of the all forgotten sunflower butter that I think is oh-so-delicisious, but hardly used. So with a few minor substitutions, I whipped these up last night while the girls were in bed. And the best part? they tried them for breakfast and they liked them! Yay! And I have to say I do too. Super yum with all sorts of healthy goodness in there to make a mom’s conscience rest easy.
Here is the recipe that was adapted from Veggie and the Beast:
Sunflower Butter and Chocolate Chips Protein Muffins
YIELD: 10 – 12 muffins (I only got 10)
PREP TIME: 10 minutes
COOK TIME: 15 minutes
TOTAL TIME: 25 minutes
Ingredients:
- ¾ cup whole grain spelt flour (or whole wheat pastry flour)
- ½ cup quick oats
- ¼ cup wheat germ
- 1 teaspoons baking powder
- ½ teaspoon baking soda
- ½ teaspoon ground cinnamon
- ¼ teaspoon salt
- ½ cup natural unsweetened applesauce
- ⅔ cup creamy peanut butter
- 3 tablespoons honey
- 3 tablespoons dark brown sugar, packed
- 1 large egg
- 2 teaspoons vanilla extract
- ½ cup 2% plain Greek yogurt
- 1/3 cup mini chocolate chips
Directions:
- Whisk together the flour, oats, wheat germ, baking powder, baking soda, cinnamon and salt in a bowl. Set aside.
- In another bowl, stir together the applesauce and peanut butter. Mix in the honey, sugar, egg, and vanilla, and then stir in the Greek yogurt.
- Slowly add the dry ingredients to the wet ingredients. Fold in the chocolates chips.
- Drop the batter into 12 lined and greased muffin tins.
- Bake at 350 for 15-18 minutes, until a toothpick/knife inserted in the center comes out clean.
- Allow to cool completely. Store in an airtight container. Since this is an oil-free quick bread, the muffin flavor and texture will improve overnight.
Christmas Dinner Place Card Freebie!
This year we aren’t hosting Christmas for the first time in a looooong time. We are going to enjoy the day stress free at my brother’s house this year, which I am kind of relieved to not have to plan and host a big dinner. Aaaaahhhh! That said, I love to decorate the table for Christmas and come up with fun place card holders for the table. I always do something simple and pretty inexpensive…usually it involves my husband going out and picking some evergreen branches for me from some trees outside 🙂 Last year was one of my favorite tablescapes with skinny pine tree branches stuck in left over pieces of wood from what we cut off from our Christmas tree. My husband drilled a hole in the middle of the small stumps so the branches slid right in. It was simple, free and easy. I wish I had some pictures, but I sadly forgot to take any.
BUT, the other dressing for the table were these fun place cards (Click here for the free download!!). You can type in the names of your guests in the PDF or just leave it blank and write them in yourself. You choose! Click here for the free font if it doesn’t show on your computer. Enjoy!
Soup Craze! Butternut Squash…Tomato…What’s Next Week?
I just finished up an evening with long time girlfriends. It’s our second annual gathering to wrap presents for an adopted family and I have to say, it’s something that I am so thankful we started last year and hope we continue for many years to come. I’m also wondering why we didn’t start it sooner?! Thank you Kelsey for kick starting us! It’s the least we can do for those in need, especially when we all pool our resources together and buy gifts for a family that needs a little extra help over the holidays.
Not only does it feel good to wrap presents for others, but it’s a great excuse for us to all gather together when our lives are so busy with our own families and children and activities. We get to chat, drink wine, and nibble while we wrap the gifts. I wish we could do this more often, but I will take what I can get!
A humble offering of soup seemed right for the occasion (plus I’ve been on a soup kick these last few weeks…tomato, pesto vegetable with orzo, cream of broccoli and potato leek), so I made a roasted butternut squash and parsnip soup topped with creme fraiche and parsley. Super easy…ahem…here is the tip that makes it so easy…buy the precut squash from your supermarket!!! Just throw your squash, parsnips and onion on a pan with some parchment paper and olive oil to roast and you have pretty much finished the bulk of the work. Shazzam!
Here’s the recipe for the Butternut Squash and Parsnip Soup…and scroll down for the Tomato Soup recipe from an earlier instagram post too!
Butternut Squash and Parsnip Soup
- 4 Cups cubed butternut squash (approx. 1.5″)
- 3 peeled and cubed parsnips
- 2 medium onions cut in large chunks
- 6 cups vegetable stock
- 1/2 tsp thyme
- 1/2 tsp garlic powder
- 1/2 tsp dried mustard
- pinch of cayenne
- salt and pepper to taste
- drizzle of cream or half and half
Heat oven to 400 degrees. Spread the chopped vegetables on a parchment lined sheet pan tossed with a few tablespoons of olive oil and roast in the oven for 40 minutes or until soft. Place roasted vegetables in a large pot and add vegetable stock. Heat to a low boil and add remaining ingredients. Then using a stick blender (my preferred method), blend the soup until smooth. Serve and top with creme fraiche and parsley.
* You can easily substitute other vegetables for the parsnips, such as carrots, potatoes, etc.
Fresh Tomato Soup
- 1 slice onion
- 4 whole cloves of garlic
- 3 tablespoons olive oil
- 4 cups chopped fresh tomatoes
- 2 cups vegetable or chicken broth
- 2 tablespoons chopped basil
- 2 tablespoons butter
- 2 tablespoons all-purpose flour
- 1 teaspoon salt
- pepper
- 2 teaspoons white sugar, or to taste
- drizzle of balsamic vinegar
- drizzle of cream or half and half
- In a stockpot, over medium heat, saute the onion and garlic cloves for 8-10 minutes. Add broth and tomatoes and bring to a boil, and gently boil for about 20 minutes to blend all of the flavors. Add the chopped basil. Remove from heat and run the mixture through a food processor or use a stick blender (my preferred method) and blend until smooth.
- In a small pot, melt the butter over medium heat. Stir in the flour to make a roux, cooking until the roux is a medium brown. Gradually whisk in a bit of the tomato mixture, so that no lumps form, then stir in the rest. Season with sugar, salt, balsamic, cream and adjust to taste.