Category Archives: Food

Comforting recipes and baking ideas that are healthy and fun for the family and kids.

Oatmeal Raisin Cookie Granola Bars

IMG_5362

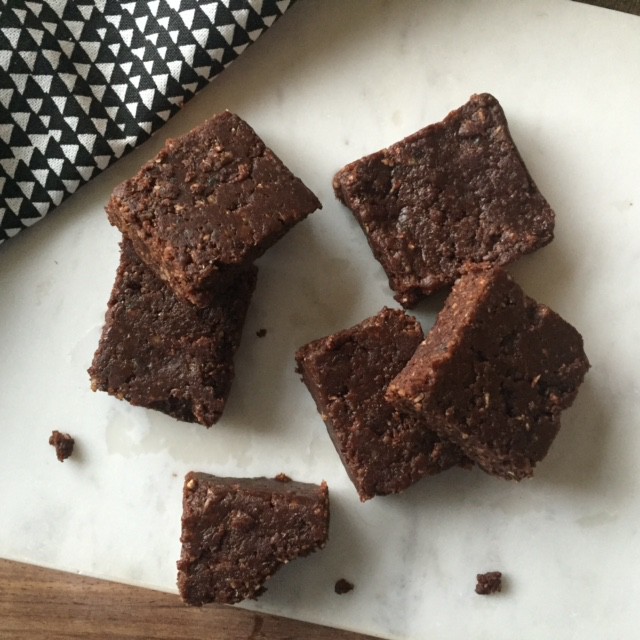
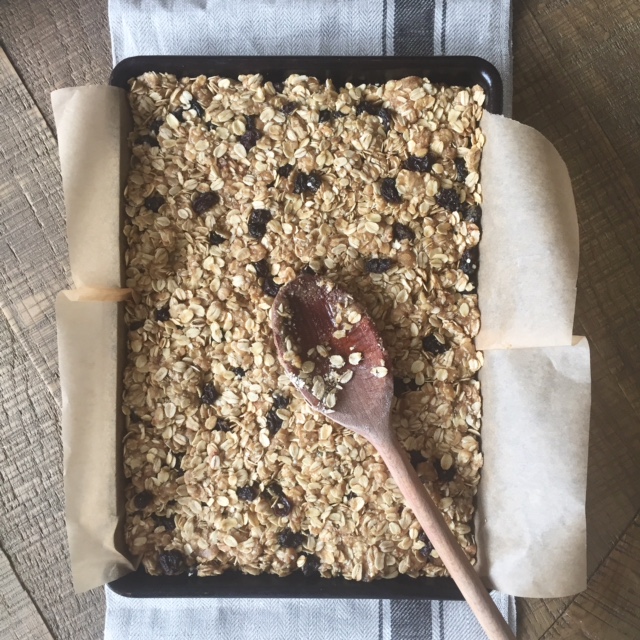
It was a granola bar kind of day around here – cloudy and kinda slow. I do a different variation of this recipe almost every time, but today I wanted to keep it simple and classic with the flavors of oatmeal raisin cookies. I have brought these bars to plenty of parks, picnics and play dates and I have never met a kid (or husband) that didn’t like them. They whip up super quick, make a ton and last for at least a week or more. A pretty perfect snack if you ask me.

Feel free to add in, swap or exchange ingredients. I substitute some of the oats for rice crispies, use coconut flour, add flax, hemp or chia seeds at times too (I did throw in a little hemp seeds in this batch!!). Dried cranberries, dates, apricots or cherries are also yummy alternatives. The one thing I don’t alter is the coconut oil. I tried several batches with butter and/or oil and they both fell apart or were too greasy. The coconut oil is perfect for melting and then solidifies when it’s cooled – plus it’s a healthy alternative and adds flavor. Have fun experimenting!

Ingredients

  • 4 1/2 cups rolled oats
  • 1 cup whole wheat flour
  • 1 teaspoon baking soda
  • 1 teaspoon vanilla extract
  • 2/3 cup coconut oil melted
  • 1/2 cup brown rice syrup (or honey)
  • 1/3 cup packed brown sugar
  • 1 tsp cinnamon
  • 1 cup raisins

Directions

  1. Preheat oven to 325 degrees F (165 degrees C). Lightly grease one 9×13 inch pan or line it with parchment paper.
  2. In a large metal mixing bowl melt the coconut oil over the stove top (very important it’s metal! Otherwise melt it in the microwave). Add brown sugar, brown rice syrup and vanilla and mix until combined.
  3. Add in the oats, flour, baking soda, and cinnamon and mix until combined. Stir in raisins.
  4. Press mixture into the prepared pan. Bake at 325 degrees F (165 degrees C) for 18 to 22 minutes or until golden brown. Let cool for 10 minutes then press down again with a flat surface (a measuring cup works great). Cut into bars. Let bars cool completely in pan before removing or serving.

Yellow Squash Cranberry Muffins

IMG_5349

A few years ago I planted some yellow squash and it went gang busters in the garden. I made fritters with it, sauted it, roasted it, you name it. But I was at a loss of what else to do with it. So I found this recipe from CaramelPie and altered it to cut down on prep time and make them a little more healthful. And since the, they have been by far one of my favorite summer baked goods.

I just baked up my first batch of the season and they are just as yummy as I remember! Super moist, light and delicately sweet!

Ingredients:

15 muffins

  • 2 cups baby yellow squash grated
  • 2 eggs
  • 1cup melted butter
  • 1cup applesauce
  • 1cup sugar
  • 12  cup brown sugar
  • 2 cups whole wheat flour
  • 1 cup all purpose flour
  • 5 teaspoons baking powder
  • 1teaspoon salt

Directions:

  1. Wash squash, trim ends, and grate.
  2. Measure 2 cups of the squash, combine with eggs, butter, and applesauce, and set aside.
  3. Combine dry ingredients in a large bowl.
  4. Make a well in center of mixture.
  5. Add squash to dry ingredients, stirring only until moist.
  6. Spoon into greased muffin tins, filling 3/4 full.
  7. Bake at 350 degrees F for 18-20 minutes or until toothpick inserted in center of muffin comes out clean.

Chocolate Almond Spread – So Good!

IMG_5169


Oh my goodness ladies and gents! Who doesn’t like chocolate spread?! And if you are like me, you would prefer a healthier version of the said “Nutella” version. This recipe could easily be used with hazelnuts for a more authentic Nutella taste, but I love it with almonds and so here is my version. It’s so easy to make (especially if you have a Blendtec or Vitamix blender) and you can eliminate some of the guilt when bribing your kiddos with some chocolate on their toast! Made with healthy coconut oil and almonds, it’s heavenly on toast topped with berries, sandwiches, inside/on top of muffins, used as tart filling, etc, etc. There is some sugar in there, but I reduced it as best as I could and still maintain some of the sweetness.

I’m trying to be good, but I can’t help but “clean” the knife when I am making the kids sandwiches! Stay tuned for a freebie Father’s Day card next week and take a peek at my Holiday card in the previous post…it’s up for voting on Minted (link to vote in post)!!! Eeck!

Ingredients

2   cups toasted almond slivers
12  cup coconut oil, melted
12  cup cocoa powder
1   tsp vanilla extract

3/4 cup powdered sugar

Directions

  1. Add coconut oil and almonds to blender and secure lid. Blend on a low speed for 15 seconds and then increase to a high speed for 35 seconds.
  2. Stir mixture towards center of jar, then secure lid.
  3. Blend on a medium speed for 50 seconds more.
  4. Add cocoa powder, vanilla extract, and powdered sugar to jar and secure lid. Blend on a medium speed for 50 seconds.
  5. Store in an airtight container in the refrigerator for 4-6 weeks. Bring to room temperature before serving.

Easiest Limecicles Ever!!

IMG_4996

I don’t know about you, but there is something about making treats and desserts for my kids and husband that just makes me feel good inside. Maybe it’s because it’s my way of showing them I love them and care. Or maybe because it takes me back to a time when I idealize a simpler life. Don’t get me wrong, I’m all about shaving off minutes of my day by picking up ready made at the store. But when I have a moment, I love making treats and snack for my family.

I digress…Are you ready for the easiest, and might I add, yummiest limecicles ever?! My girls love these time and time again and they are by far their favorite of the rotation. I found the recipe from Girl vs. Dough (love her site!) last summer and with a little tweak (more lime!!), I made them continuously throughout the season.  I have recently pulled the recipe out of the archives already for this year. With just three ingredients and a freezer, you will with out a doubt be the “cool” mom 😉

Limecicles

Recipe adapted from Girl vs. Dough

Prep Time: 

Total Time: 

Yields About 12 (3oz) Popciclces

Ingredients

  • 2 cups milk (I used 2%)
  • 1 cup fresh lime juice (from about 8 to 10 small limes)
  • 1 (14 oz) can sweetened condensed milk

Directions

  1. Pour milk, lime juice and sweetened condensed milk into a large bowl; stir until well combined.
  2. Pour mixture into popsicle molds; place a popsicle stick in the center of each mold.
  3. Cover and freeze at least 8 hours or overnight. To easily remove popsicles from the mold, dip the mold in a bowl or container of warm water for 10 to 15 seconds.

Easy Zucchini Corn Pancake Recipe

IMG_4643

So I’m in serious need of some good ol’ comfort food and I’m sorry, but I just can’t wait until the fall for it to be “acceptable” again to indulge myself in mashed potatoes, mac n cheese, mashed potatoes…I mentioned that one already didn’t I? That said, this is a comfort food disguised in a spring package! They are easy, flavorful, seasonal and down-right comforting. In fact I am eating some right now 🙂 Perfect for a quick throw together dinner or even make mini ones for an appetizer for a ladies night in.

Recipe adapted from King Arthur


Ingredients:

5 large eggs, beaten
1/4 cup olive oil
2 tsp salt
1/2 tsp ground pepper
1 tsp dried oregano
3 cups grated zucchini (about one large zucchini)
1 cup fresh sweet corn off the cob or frozen corn
1 cup shredded cheddar cheese (or your favorite cheese)
1 cup unbleached all-purpose flour

Directions:

In a large bowl, combine eggs, oil, salt, pepper and dried herbs. Whisk to combine.
Add the zucchini, corn and cheddar cheese and stir thoroughly with a spatula.
Add the flour and stir until thoroughly combined and there are no pockets of dry flour hiding in the batter.
Heat a large cast-iron skillet or griddle to medium-high heat, adding a very small amount of oil to the skillet/griddle. I used cooking spray to make it easy. Using an ice cream scoop, scoop 1/4-cupfuls of batter onto the skillet and flatten with the back of the scoop into a circle about 4 inches in diameter. Cook on each side about 3-4 minutes, or until a deep golden brown. Remove from skillet and transfer to a plate. Repeat with remaining batter. Serve warm with your favorite toppings.

Spring Cocktail with Rhubarb Simple Syrup

IMG_4577Last year, I made plum simple syrup from our plum tree and it was absolutely delicious paired with vodka and soda. It’s still too early for plum season, but our rhubarb is coming up like gangbusters. And there are only so many things you can make with rhubarb that my family will eat. I personally would eat it any ol’ way, but my husband and kiddos are more particular and have their quota of baked goods and jam.

For an adult only treat, I was curious what a rhubarb simple syrup would turn out like. I followed my basic recipe and added a few cups of chopped rhubarb during heating. I then strained the juice through a mesh strainer and kept the remaining cooked fruit. After my experiment two things were a happy surprise. 1. the simple syrup makes for a yummy, refreshing and beautiful vodka soda cocktail. 2. The remaining cooked and strained rhubarb is perfectly sweetened and makes for delicious rhubarb sauce! Served it warm over vanilla ice cream for dessert.

Here is the recipe for you all – super easy and quick!

Rhubarb Simple Syrup

Ingredients

1 cup white sugar

1 cup water

2 cups 1/2″ diced rhubarb stocks

Directions

  1. In a medium saucepan combine sugar, water and rhubarb. Bring to a boil, stirring, until sugar has dissolved. Strain juice through a mesh strainer in to large mason jars or any sealable container. Keep the fruit for a delicious sauce! Allow to cool.

For the Cocktail

In 8 – 12 oz glass filled halfway with ice, add 1.5 oz vodka of choice, club soda until 2/3 full, then finish it off with the simple syrup to taste.

Sweet Potato Chai Muffins with Coconut Oil

IMG_4472

I’m a little surprised at how often I make muffins these days since I wasn’t a huge muffin baker in the past. But now that my kids are going to school in the mornings and need a quick breakfast that’s also wholesome, I find myself trying more and more muffin recipes. Who doesn’t get tired of cereal and frozen waffles every morning! We gotta mix it up and we leave the pancakes (unless I make extra and freeze them) and smoothies for the weekends.

I had sweet potato in the freezer the other day that needed to be used (here’s a HUGE tip…buy the frozen mashed sweet potato from Trader Joes! Just defrost and you are good to go!!) and so decided to make this recipe that originally used pumpkin and then I swapped out the butter for the coconut oil. Easy peasy! I personally like coconut oil in my muffins and my girls like it too, but it can make the texture a little denser. That said, I love the added flavor the chai tea brings to these muffins.

Sweet Potato Chai Doughnut Muffins Author: Adapted from Martha Stewart Ingredients

For the muffins: Makes 12

  • ⅓ cup milk
  • 1 bag chai tea
  • 10 tablespoons coconut oil
  • 2 cups all­purpose flour, plus more for pan
  • 1 cup whole wheat flour
  • 2½ teaspoons baking powder
  • 1 teaspoon salt
  • ½ teaspoon nutmeg
  • ¼ teaspoon allspice
  • ¼ teaspoon cardamom
  • ¼ teaspoon baking soda
  • 1¼ cups cooked and mashed sweet potato (pumpkin can easily be substituted)
  • ¾ cup lightly packed brown sugar
  • 2 eggs
For the sugar coating:
  • ¾ cup granulated sugar
  • 2½ teaspoons cinnamon

Directions

1. Pour milk into a mug or small microwaveable bowl. Heat in microwave 40 seconds until hot (but not scalding). Steep tea in milk 10 minutes.

2. Meanwhile, heat oven to 350 degrees F. Butter and flour 12 standard muffin cups. In a medium bowl, whisk flour, baking powder, salt, nutmeg, allspice, cardamom and baking soda until well combined.

3. Remove tea bag from milk, squeezing out any extra liquid and flavor from bag. Pour milk into a small bowl and stir in canned pumpkin until mixture is well combined.

4. In a large bowl or bowl of a stand mixer, beat oil and brown sugar on high speed 1 to 2 minutes. Add eggs, one at a time, beating well after each addition.

5. Using a spatula, wooden spoon or stand mixer on low speed, alternate stirring in flour (in 3 additions) and sweet potato mixtures (in 2 additions), beginning and ending with flour mixture, just until batter is combined.

6. Spoon batter evenly into prepared muffin cups. Bake 23-25 minutes until a toothpick inserted in center comes out clean. Cool muffins 10 minutes in pan on a cooling rack.

7. Meanwhile, in a small bowl, whisk together sugar and cinnamon. One at a time, remove muffins from pan then roll in sugar­cinnamon mixture. Transfer to cooling rack to cool completely.

Quick and Easy Hot Cross Buns

IMG_4357I was determined to make hot cross buns for Good Friday today and although they came out differently than I had anticipated, they came out delicious and far quicker than I had planned!! I thought I had yeast to make the traditional version, but because just assumed I had some, when it came to the yeast step and went to grab it…sigh…I was out. So with a little improv and internet checking, I came up with a baking powder version for what I had already started and they came out yummy and easy!!! A little different in texture of course, but the flavors are there 🙂 The recipe is below as well as some instagram easter basket and egg decorating idea pics I posted for Easter.

Ingredients:

  • 3 cups flour
  • 4.5 tsp baking posder
  • 1/2 tsp salt
  • 1/4 tsp cardamom
  • 1/4 tsp nutmeg
  • zest of one navel orange
  • 1/2 tsp ground cinnamon
  • 3 Tbsp butter room temp
  • 1/4 cup sugar sugar
  • 1/4 cup dried cranberries
  • 1/4 cup chopped dried apricots
  • 1/4 cup raisins
  • 1 egg
  • 1 cup buttermilk

Directions: Makes 12

Preheat oven to 350 F

  1. Whisk dry ingredients, sugar, orange zest and fruit into a large bowl.
  2. Rub in butter with fingers until mixture resembles fine breadcrumbs.
  3. Whisk buttermilk and egg together and add to dry ingredients. Mix just until a soft dough forms.
  4. Turn onto a floured board, knead lightly.
  5. Pat out to approximately 1 inch thickness and, using a 3-4″ round cutter, cut into buns.
  6. Place onto lightly greased oven tray.
  7. Bake at 350 for 12-15 minutes.
  8. Glaze: Mix 1/4 cup powdered sugar with buttermilk one tablespoon at a time until a paste is formed.
  9. Remove from oven and brush buns with glaze.  
  10. Cool buns on a wire rack. Cut slivers of dried apricots to make crosses and place on top of buns.


IMG_4326

Easter basket inspiration. Most of these items are from the Target Dollar Spot…ummm…super cute bunny tote, right?!

IMG_4345

I decorated some eggs and went the super simple, yet chic route: brown eggs and a white Sharpie – how easy can it get??!!


Strawberry Milk – Moms, You Can Say “Yes”!!

IMG_4060IMG_4060What kid doesn’t want strawberry or chocolate milk? And what Mom doesn’t dread saying “no” to yet another treat? I had a lightbulb go off recently and thought, why not just blend strawberries with milk to make actual, real, authentic strawberry milk?! Seems so obvious, but a foreign concept at the same time. So I got out my try trusty blender, added some strawberries aaaaaaand…sort of bland 🙁 But I’m not one to get discouraged and waste perfectly good strawberries so easily. I ran my thinking hamster around in my head and decided a dash of (real) maple syrup might do the trick, but also keep the healthy factor in tact. And wouldn’t ya know?! It’s delicious and my daughter loves it. Store any extra in the fridge for a few days and pull it out for an extra special treat you can feel good about.

No recipe is needed really. Just add a container of strawberries to about 16-24 ounces of milk with a tablespoon or two of syrup, blend, and you are good to go! Enjoy being a cool mom once again!

No Bake Raw Brownies: So Yum…and healthy!

IMG_3977If you haven’t tried raw brownies yet, you have to. They are the easiest and yummiest healthy brownies you can make. I’ve made my fare share of “healthy” brownies and these are by far my favorite. Yet this time, on a whim, I decided to throw in a tad of unsweetened coconut and I don’t think I can go back to making them without. Delish!

Here’s the recipe:

Ingredients

  • 2 cups  raw walnuts
  • 11 madjool dates, pitted
  • 1/3 cup (60 g) cacao powder or unsweetened cocoa powder
  • 1/4 cup unsweetened shredded coconut (optional)
  • 1/2 tsp vanilla
  • 1/4 tsp sea salt
  • 2 tsp water

Directions:

1. Place walnuts  in food processor and process until finely ground.

2. Add the dates and sea salt and pulse to combine.

3. Add the vanilla, cacao powder and coconut to the food processor and process until small bits remain.

5. Process until a dough consistency is achieved, adding the water and/or more dates if the mixture does not hold together when squeezed in your hand. Y

6. Add the brownie mixture to a parchment lined loaf pan. Press down with hands until it is flat and firm.

7. Place in freezer or fridge to chill for 10-15 minutes before cutting into 10 even squares.